Restoring Seal Integrity: How to Repair Your Refrigerator Door Seal
Is your refrigerator door seal failing to do its job? Even a small gap or weakness in the seal can lead to larger issues such as increased energy consumption and spoiled food. Fear not, though. With a few simple steps, you can restore your refrigerator’s efficiency and functionality. Let's dive into the ways to repair a refrigerator door seal, explore challenges you might face, and how to maintain those fixes for lasting results.
Understanding the Role of a Refrigerator Door Seal
A refrigerator door seal, or gasket, is vital for maintaining the internal temperature of your fridge. Acting as a barrier between the cool inside air and the warmer room air, it keeps the appliance running efficiently by minimizing energy loss. A properly functioning seal ensures your food stays fresh longer and your energy bills remain low.
Recognizing the Signs of a Failing Seal
Before embarking on a repair journey, it’s crucial to understand the symptoms that indicate a failing door seal. Look out for:
- Visible Gaps or Cracks: Noticeable breaks within the seal that cause air leaks.
- Excess Condensation: More condensation than normal might suggest the seal isn't tight.
- Frost Buildup: An increase in ice crystals inside your refrigerator could be due to excess moisture ingress.
- Increased Energy Bills: If your electricity usage spikes without other reasons, your refrigerator might be working overtime to compensate for a poor seal.
Preparing for Repair: What You’ll Need
Before the repair process begins, gathering the right tools and materials is essential. Here’s what you’ll need:
- A screwdriver
- Warm, soapy water
- A clean cloth
- Silicone lubricant
- Replacement seal (if necessary)
- Hairdryer or heat gun (optional)
Step-by-Step Guide to Repairing a Refrigerator Door Seal
Cleaning the Seal
Often, dirt and grime hinder the seal's effectiveness. Start by giving the seal a thorough cleaning.
Detach and Clean: Use warm, soapy water and a cloth to clean the seal. Avoid using harsh chemicals as they may cause damage.
Inspect: Check for cracks or brittleness while cleaning. If the damage is minor, adjustments might be enough.
Adjusting the Seal
If cleaning didn't resolve the issue, try adjusting the seal.
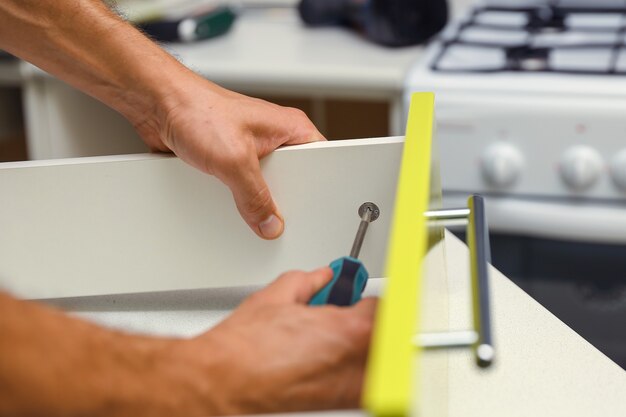
Loosen Screws: Using a screwdriver, slightly loosen the screws holding the seal in place without removing them completely.
Realign the Seal: Adjust the seal to fit snugly against the door edge, ensuring no visible gaps remain.
Tighten the Screws: Carefully retighten the screws while holding the seal in place.
Repairing Minor Damage
Minor damage often sees quick fixes.
Apply Heat: Use a hairdryer to gently heat the seal. This will soften any hardened areas, allowing you to reshape it for a better fit.
Use a Silicone Lubricant: Applying a silicone-based lubricant can seal small cracks, improving the gasket’s adhesion.
When to Replace a Refrigerator Door Seal
Sometimes, repairs aren’t enough, and a replacement becomes necessary.
How to Replace a Seal
Remove the Old Seal: With a screwdriver, remove the screws or clips holding the old seal.
Position the New Seal: Align the new seal correctly with its grooved side facing the refrigerator.
Secure the Seal: Tighten the screws or clips evenly, ensuring the new gasket forms a firm and uniform seal.
Choosing the Right Replacement
- Model Compatibility: Ensure that the replacement seal is compatible with your refrigerator model for assured fitment.
- Material Quality: Opt for high-quality materials that promise durability and flexibility, extending the life of the new seal.
Maintaining Your Refrigerator Door Seal
Regular maintenance can keep your fridge seal functioning like new for years.
Routine Cleaning
Scheduled cleaning every few months can prevent build-up and damage. Use mild detergents and ensure the seal is dry after cleaning.
Periodic Inspection
Every few months, check for signs of wear. Addressing tiny problems early can prevent larger and more costly issues.
Preventative Measures
- Avoid Overloading: Overstuffed doors can distort the seal.
- Handle with Care: Teach family members to gently close doors, preserving alignment.
Common Challenges and Troubleshooting
Persistent Gaps
If gaps persist post-repair, the underlying issues might be more serious. Re-adjusting can solve small alignment issues, but persistent ones may require a full replacement or professional consultation.
Adhesion Problems
If a new seal seems loose, consider checking the door alignment and adjusting the fridge feet for balance. Proper leveling can allow uniform door seating.
Cold Air Leakage Despite Repairs
- Check for Obstructions: Sometimes, shelves or forgotten items might prevent proper door closure.
- Evaluate Door Hinges: Loose hinges can affect seal pressure, requiring tightening or replacement.
Actualizing Energy Savings with Effective Seals
Achieving energy efficiency not only supports your pocket but also contributes to environmental conservation efforts. Ensuring your door seal is in tip-top shape reduces strain on your appliance, providing economic and environmental benefits.
⭐ Quick Summary: Key Tips for Refrigerator Door Seal Repairing
- 🔎 Recognize Signs: Gaps, condensation, frost, and bill hikes signal seal issues.
- 🧰 Gather Essentials: Screwdriver, soapy water, cloth, silicone lubricant, replacement seal.
- 🚪 Clean, Adjust, Repair: Clean seals and adjust screws for minor fixes; use heat for reshaping.
- 🔄 Replace if Necessary: Ensure fitment and quality with compatible, durable parts.
- 🏠 Maintenance Matters: Clean regularly, inspect, and practice gentle door handling.
Maintaining, repairing, or replacing a refrigerator door seal can substantially impact your appliance’s efficiency and lifespan. With a bit of focus and effort, you can ensure your refrigerator stays cool, both effectively and economically. Happy repairing!