Is Your Refrigerator Door Gasket in Good Shape? Here's How to Check!
Have you ever opened your refrigerator and noticed it wasn't as cold as it used to be, no matter how much you adjust the settings? The culprit might not be the refrigerator itself but the door gasket. This essential yet often overlooked component helps maintain optimal temperature by sealing the cold air in and keeping warm air out. A faulty gasket can lead to increased energy consumption and spoilage of food. But how can you test your refrigerator door gasket? We're diving into practical methods and insights to help you ensure your appliance's efficiency and longevity.
Understanding the Importance of Refrigerator Door Gaskets
What is a Refrigerator Door Gasket?
A refrigerator door gasket is a flexible elastic strip designed to seal the door's perimeter. Think of it as the unsung hero that prevents cold air from escaping while keeping room temperature air from seeping in. This not only helps in maintaining the refrigerator's internal climate but also plays a crucial role in energy conservation, as the compressor doesn't have to work overtime.
Why Do Gaskets Matter?
Energy Efficiency: A poor seal can cause the refrigerator to use more electricity, leading to higher energy bills and unnecessary wear on the appliance.
Food Preservation: A well-functioning gasket helps maintain the temperature and humidity levels essential for the freshness of your food.
Appliance Longevity: By ensuring the compressor works as needed and not excessively, you extend the life of your refrigerator.
Signs Your Gasket Needs Testing
Knowing when to test your gasket is essential. Here are some indicators that warrant an inspection:
- Frost Buildup: Ice or frost accumulation inside the fridge could be a sign of a compromised seal.
- Higher Energy Bills: If you notice a spike in energy costs, it might indicate your fridge is overworking.
- Moisture Around the Seal: Condensation on the gasket or nearby surfaces suggests a leak.
- Visible Cracks or Deformations: Physical damage to the gasket is a clear signal it might need replacing.
Testing Your Refrigerator Door Gasket
1. The Dollar Bill Test
A simple yet effective way to test the gasket's effectiveness:
- Step 1: Close the refrigerator door on a dollar bill.
- Step 2: Try to pull the bill out.
If you can easily remove the bill without any resistance, your gasket might be failing. Perform this test around various spots on the door to ensure comprehensive coverage.
2. Visual Inspection
Performing a careful visual examination can often reveal obvious issues:
- Look for Tears or Cracks: These are likely spots where air can escape.
- Check for Mold or Mildew: This can degrade rubber and compromise the seal.
- Inspect for Alignment: Ensure the gasket sits flush against the frame.
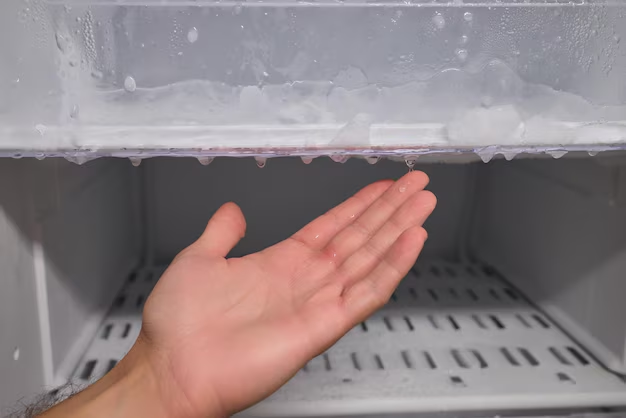
3. Feel for Cold Air
Using your hand, feel around the door's edges for any noticeable drafts. This signifies where the seal may be compromised.
4. Door Balance Test
Ensure the door is properly aligned and the gasket makes uniform contact with the fridge body:
- Open the door halfway and let go. It should close on its own smoothly. If it doesn't, the door hinges might need adjusting.
Maintaining Your Refrigerator Gasket
Cleaning and Care Tips
Regular maintenance is key to prolonging the life of your gasket:
- Wipe Regularly: Use mild soap and water to clean the gasket periodically, removing dirt and food residues that can cause damage.
- Avoid Harsh Chemicals: These can deteriorate the rubber.
- Check for Damage After Cleaning: Regular cleaning gives you a chance to inspect for problems early on.
Adjusting the Door
If the door isn’t sealing properly due to misalignment, gentle adjustments might be needed:
- Check Hinges: Ensure they’re secure and in good condition.
- Re-level: Sometimes, leveling the fridge can correct door alignment issues.
When to Replace the Gasket
If your gasket is beyond repair, here are signs replacement is necessary:
- Persistent leaks or insufficient sealing despite cleaning.
- Advanced wear like splits or permanent deformations.
- Age, as older gaskets naturally lose elasticity over time.
Installation Basics for New Gaskets
Should replacement be necessary, here's a general guide for installing a new gasket:
- Purchase the Correct Gasket: Make sure it is specifically designed for your refrigerator model.
- Soften the Gasket: Place it in warm water for flexibility, which eases installation.
- Remove Old Gasket: Loosen the screws holding it in place (if applicable), then detach.
- Install the New Gasket: Align properly and secure using existing screws or press-fit mechanisms.
Summary of Best Practices
Here’s a quick guide to ensure your refrigerator is functioning at its best:
- 🧊 Dollar Bill Test: Conduct regularly to spot leaks.
- 👀 Visual & Draft Check: Look for tears, mildew, and cold air drafts.
- 🛠️ Maintenance: Clean regularly with mild solutions and ensure door alignments.
- 🔧 Balance & Adjustment: Regular adjustments if needed.
- 🌟 Replacement: Don't hesitate to replace when signs of wear appear.
By safeguarding your refrigerator gasket, you're not just ensuring a lower electricity bill. You maintain the freshness of your food and prolong the life of your appliance. Make it a routine to check, clean, and, if necessary, replace your refrigerator gasket—and enjoy the benefits of a well-maintained kitchen essential.