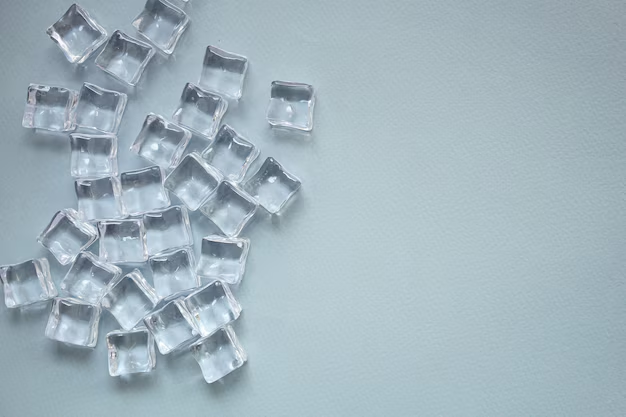
Elevate Your Ice Game: How to Get Crystal Clear Ice Cubes from Your Refrigerator
Imagine this: it's a sweltering day, your guests are thirsty, and you pour a chilled beverage over a glass full of perfectly clear ice cubes. It’s the kind of ice that makes your drink look pristine and inviting, as if crafted by a professional. Thankfully, achieving this level of elegance with your home refrigerator is simpler than it seems. Let’s dive into the art of producing crystal-clear ice cubes and explore the science, methods, and tips behind this satisfying achievement.
Why Clear Ice Matters
Clear ice is not merely a visual delight; it holds practical benefits as well. It melts slower than cloudy ice, which means your drink stays cold without getting diluted quickly. The transparency of clear ice is a result of freezing out impurities and air bubbles usually trapped in regular cloudy ice cubes.
The Science Behind Clear Ice
To understand why ice becomes clear or cloudy, we need to consider the freezing process. Most household freezers freeze water from the outside in, trapping air bubbles and impurities in the center of the cube, which causes cloudiness. In contrast, clear ice is formed when water freezes in a way that allows gases and impurities to escape.
Getting Clear Ice at Home: Methods and Techniques
Achieving clear ice at home isn't as daunting as it may seem. Here are some effective techniques to guide you on this icy adventure.
1. Directional Freezing
Directional freezing is a popular method that mimics how lakes freeze from the surface down, minimizing trapped air and impurities. Here’s how it works:
- Insulate Your Ice Tray: Use an insulated container, like a small cooler or a store-bought directional freezing kit, to produce ice. This setup forces the water to freeze from the top down.
- Leave Room for Expansion: Ensure there’s enough space at the bottom to allow impurities and air to settle.
- Slow and Steady: Place your setup in the freezer and let it freeze slowly, preferably 24 to 48 hours, for best results.
2. Using Filtered or Boiled Water
Though not entirely foolproof on its own, using boiled or filtered water can improve clarity:
- Filter First: Use distilled or filtered water to reduce impurities.
- Double Boil the Water: Boil the water twice, allowing it to cool in between, to help reduce the presence of dissolved gases.
- Freeze Slowly: Combine this with the directional freezing for superior results.
3. Quality Ice Molds
High-quality silicone molds can aid in achieving clear ice by allowing for slower, even freezing. These are designed to allow excess water and impurities to escape, much like in directional freezing.
Refrigerator Ice Makers: What You Should Know
1. Integrated Ice Maker Limitations
Refrigerator ice makers often face challenges in producing clear ice due to the rapid freezing they employ. However, small improvements can be made:
- Change Freezer Settings: Aim for a slightly warmer setting to slow the freezing process.
- Replace the Water Filter: Regularly replace refrigerator water filters to ensure only the cleanest water is used for ice production.
2. External Ice Makers and Kits
If achieving clear ice from your refrigerator’s built-in ice maker proves difficult, consider using an external ice maker designed for clarity, such as those using slow, directional freezing methods.
Practical Tips for Better Ice Quality
Achieving clear ice is part science and part art. Here are more tips to make sure your ice is consistently clear and visually appealing:
- Use Pre-Bagged Water: Some people report success using water pre-bagged for ice makers, which can be more reliably free from impurities.
- Position Matters: If using removable trays, place them in the coldest spot of your freezer after initial slow freezing to finish the process.
- Avoid Disturbance: Try to minimize opening your freezer frequently during the freezing process, as it could disrupt the necessary calm environment for clear ice formation.
Common Myths About Clear Ice
With so many tips circulating about making clear ice, it's important to debunk a few myths:
- Myth: Hotter Water Freezes Faster: While hot water can freeze under certain conditions faster than cold water, often known as the Mpemba effect, this is not a guarantee for clear ice.
- Myth: Alcohol or Saltwater: Adding alcohol or salt to the mix with the assumption that it helps in producing clear ice is ineffective. These additives can alter freezing points, complicating clarity efforts.
💡 Quick Tips for Perfect Clear Ice
Here's a quick bullet-list of tips to keep handy when aiming for that perfect clear ice:
- 🌀 Use Directional Freezing: Mimic natural freezing processes by freezing from the top-down.
- 💧 Filter Water Twice: Reduce impurities by boiling or filtering water twice.
- 🕰️ Freeze Slowly: Allow ample time for the freezing process, around 24-48 hours.
- ❄️ Control Freezer Settings: Slightly increase freezer temperature if using internal ice makers.
- 🧊 Use Quality Molds: Opt for silicone molds designed for clear ice wherever possible.
- 😌 Patience is Key: More time often results in better clarity.
Elevating Your Ice Experience
With these techniques and insights, you’re ready to transform your ice cubes from cloudy to clear, impressing guests and enhancing your drinks. The journey to clearer ice is a rewarding process that combines a bit of science with a touch of patience. Whether you’re a cocktail enthusiast or someone who appreciates the finer details of beverage preparation, mastering clear ice at home is an accessible luxury that makes your drinks even more delightful.
Remember, enjoy the process and the occasional imperfections—after all, even the cloudiest ice cube can chill a drink to perfection. Happy freezing!

