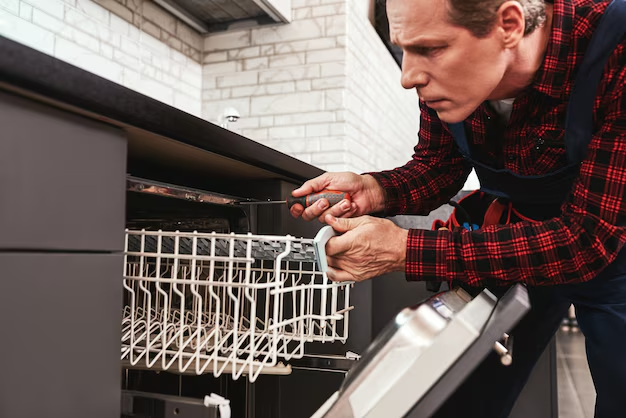
Effortlessly Installing Your New Ice Maker in a Samsung Refrigerator: A Step-by-Step Guide
Ice makers are a convenient addition to any modern kitchen, turning your refrigerator into a versatile appliance that can keep drinks refreshingly cold or make entertaining a breeze. Installing an ice maker in your Samsung refrigerator might seem daunting, but with the right guidance and tools, it can be a smooth and straightforward process. This comprehensive guide will walk you through each step, providing useful tips and insights to ensure a seamless installation experience.
Why Install an Ice Maker?
Before diving into the installation process, it's important to understand why an ice maker can be a valuable addition to your kitchen:
- Convenience: No more filling ice trays manually—your ice maker will automatically produce ice cubes.
- Efficiency: Ice makers are designed to quickly produce a large quantity of ice, which is perfect for gatherings or hot summer days.
- Space-saving: Built into the refrigerator, ice makers save space compared to standalone ice machines.
With these benefits in mind, let's explore how to install one in your Samsung refrigerator.
Preparing for Installation
Check Compatibility
Before getting started, ensure that your Samsung refrigerator model supports an ice maker installation. Many newer models come with pre-configured ports for easy ice maker integration. Refer to your user manual to verify compatibility.
Gather Necessary Tools and Materials
To install an ice maker, you'll need the following tools and materials:
- Ice maker kit (compatible with your Samsung refrigerator model)
- Screwdriver set
- Wrench
- Measuring tape
- Water line kit or adapter (if not included in the ice maker kit)
- Towel or mop for any potential spills
Safety First!
Always prioritize safety when working with appliances. Unplug your refrigerator before starting the installation to avoid electrical issues. It's also a good idea to wear gloves and safety goggles during the process.
Step-by-Step Ice Maker Installation
Step 1: Prepare the Refrigerator
- Turn off the Water Supply: Locate the cold water supply shutoff valve, typically under your kitchen sink, and turn it off.
- Empty the Freezer: Ensure the freezer is empty, which makes it easier to work inside and avoids contamination from any food items.
- Remove Shelves and Drawers: Take out any removable shelves or drawers from the freezer to ensure you have enough space to work.
Step 2: Install the Ice Maker Unit
- Position the Ice Maker: Inside the freezer compartment, locate the designated space for the ice maker installation, often indicated by pre-drilled holes and a wiring connection.
- Secure the Ice Maker: Align the ice maker with the pre-drilled holes, and use screws to secure it in place. Ensure it is firmly attached to prevent future vibrations or noises.
Step 3: Connect the Water Supply
Connecting the water supply is crucial for your ice maker to function correctly.
- Locate the Water Line Port: Check the rear of your refrigerator for a water line connection point.
- Attach the Water Line: Follow the manufacturer’s instructions to connect the water line from the ice maker kit to the refrigerator’s supply port. Use a wrench to tighten the connection, ensuring there are no leaks.
- Run the Water Line: If necessary, drill a small hole at the back or side of your cabinet to run the water line from the main valve to the refrigerator.
Step 4: Finalize the Installation
- Reconnect Power and Water Supply: Plug the refrigerator back into the outlet and turn on the water supply valve.
- Test the Ice Maker: Once the water supply is steady, the ice maker will need time to produce its first batch of ice. Wait for about 24 hours to see the results.
- Check for Leaks: Inspect all connections and the water line for any possible leaks.
Troubleshooting Common Issues
Even with careful installation, you may encounter some issues. Here are a few solutions to common problems:
No Ice Production
- Check Power Connection: Ensure the refrigerator is properly plugged in and powered.
- Inspect Water Supply: Verify the water valve is open and that the water line is free of obstructions.
Ice Maker Leaking
- Re-tighten Connections: Use a wrench to ensure all connections are secure.
- Examine Water Line: Look for any pinholes or cracks in the water line that could be causing leaks.
Ice Tastes Unusual
- Flush the Line: Run water through the water supply line to remove any contaminants.
- Check Water Filter: If your refrigerator has a water filter, ensure it is clean or replace it if necessary.
Maintaining Your Ice Maker
Regular maintenance ensures the longevity and efficiency of your ice maker. Here are a few tips:
- Clean Regularly: Every few months, clean the ice maker and bin to prevent build-up and contamination.
- Replace Water Filters: Depending on your usage and water quality, replace water filters as needed to maintain ice purity.
- Inspect Monthly: Check for any signs of wear, leaks, or unusual noises during operation.
🛠️ Quick Reference Summary
Here’s a handy summary of the installation process:
Tools Needed: Screwdriver, wrench, water line kit, towel
Prep Steps: Check compatibility, unplug the refrigerator, turn off the water supply
Installation Steps:
- Position and secure the ice maker
- Connect the water line
- Power on and test
Maintenance Tips: Clean regularly, inspect monthly, replace filters
💡 Pro Tips
- Keep a Mop Handy: In case of spills during water line attachment.
- Flat Workspace: Ensure your refrigerator is level to facilitate ice production.
Adding an ice maker to your Samsung refrigerator can enhance its functionality and ensure you're always ready to serve cold beverages or fill a cooler. By carefully following this guide, you'll find the installation process both manageable and rewarding. As you enjoy the convenience of automatic ice-making, remember that regular maintenance is key to keeping it functioning smoothly.

