Effortless Guide to Removing the Freezer Drawer from Your GE Profile Refrigerator
Whether you're cleaning, organizing, or fixing your freezer, removing the drawer from your GE Profile refrigerator can be a puzzling task. While it's a necessity for deeper cleaning or maintenance, many users find the process of removing the freezer drawer daunting. This guide is designed to simplify that process, offering step-by-step instructions, practical tips, and insights that will empower you to tackle this task with confidence.
🧊 Why Remove the Freezer Drawer?
Removing the freezer drawer in your GE Profile refrigerator can enhance both function and hygiene. Here's why this simple task is essential:
- Deep Cleaning: Freezer drawers can accumulate frost, spills, and crumbs over time, demanding more intensive cleaning than a surface wipe.
- Better Organization: Taking out the drawer allows you to reorganize your freezer space, optimizing the layout to make food more accessible.
- Maintenance and Repair: Sometimes, fixing a jam or replacing parts requires drawer removal. Having access to the internal components can save a call to the technician.
- Efficient Usage: An organized freezer reduces energy consumption by ensuring that air can circulate properly, keeping your GE Profile running smoothly.
🔧 Tools and Preparations Needed
Before diving into the process, gather these tools and prepare the space for an efficient experience:
- Screwdriver: Depending on your model, a Phillips or a flat-head screwdriver will remove screws securing the drawer.
- Towel or Soft Cloth: Protects your floor and collects any residual moisture.
- Gloves: Protective gloves keep your hands safe from sharp edges.
- Warm Soapy Water: Ideal for cleaning once the drawer is removed.
Preparatory Steps
- Empty the Freezer: Make sure to remove all the contents from the drawer to prevent spills and reduce weight.
- Power Off the Refrigerator: Unplugging ensures safety and avoids any electrical mishaps.
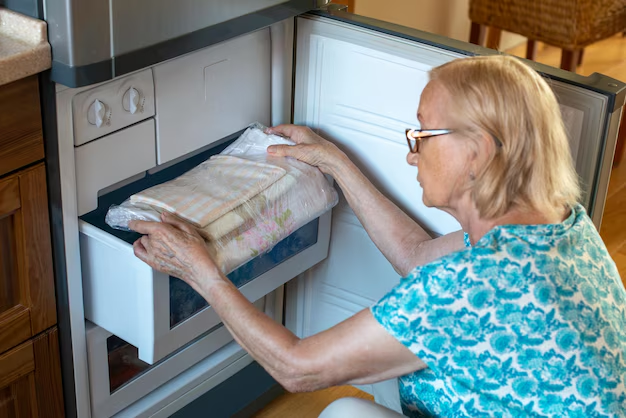
Step-by-Step Removal of the GE Profile Freezer Drawer
Step 1: Open the Freezer Door
Start by opening the freezer door and inspecting the interior. Locate the screws or locking mechanisms that hold the drawer in place — these are typically found along the sides or back of the drawer.
Step 2: Remove or Release Retainers
For some models, you'll need to release retainer clips or screws:
- Clips: Gently press on the clips to release the drawer.
- Screws: Use your screwdriver to carefully unscrew and set the screws aside in a safe spot for later use.
Step 3: Gently Slide Out the Drawer
With the retainers released, slide the drawer out gently. If you're facing resistance, double-check for any linger of fasteners. Never force the drawer as this can lead to damage.
Step 4: Additional Components
Some drawers may contain ice makers or optical sensors. If needed, disconnect any wiring connected to such components by carefully detaching the connector joints.
Step 5: Set the Drawer Aside
Place the removed drawer on the soft towel or cloth you prepared to prevent scratches on your flooring.
🧼 How to Clean and Maintain the Drawer
Cleaning frequency and method depend on your usage patterns. Here’s a practical guide on keeping your freezer drawer hygienic:
Cleaning Routine
- Soak and Scrub: Use warm, soapy water to scrub stains and grime. Avoid abrasive materials that might scratch the surface.
- Rinse and Dry: Thoroughly rinse with clean water and dry completely before placing it back to prevent ice buildup.
- Inspect Regularly: Check for cracks or damage that might affect efficiency or food safety.
Preventive Maintenance
- Regular Checks: Inspect the seals and tracks for wear and tear to ensure smooth operations.
- Organizational Tips: Use containers and labels to reduce clutter and make cleaning a breeze.
🛠️ Reinstalling the Freezer Drawer
Once you've cleaned your freezer drawer, it's time to reassemble it:
- Align Drawer with Slides: Carefully position the drawer with the track slides or grooves and push it back gently.
- Secure with Screws or Clips: Reattach screws or engage clips to firmly secure the drawer.
- Reconnect Components: If you disconnected wiring for ice makers or sensors, don't forget to reconnect them securely.
- Test the Drawer: Ensure it moves smoothly back and forth without obstruction.
🚫 Troubleshooting Common Issues
Drawer removal isn't flawless; occasionally, issues arise:
- Jamming: If doors jam or don’t align, check for obstructions along tracks.
- Electrical Components: Always ensure proper connection and alignment. Mistakes in wiring could affect functioning.
🌟 Quick Tips for Success
Here is a handy summary to ensure you experience a smooth removal process:
- 🔒 Safety First: Ensure the unit is powered down for safety.
- 📚 Refer to Manuals: Check GE Profile manuals specific to your model for unique instructions.
- 🛡️ Protect Floors: Use towels to avoid scratches or damage.
- 👐 Drying is Crucial: Thorough drying prevents frosting and freezer burn.
By taking the time to understand the process and following these practical guidelines, you not only maintain the efficiency and cleanliness of your refrigerator but also ensure its longevity and performance. Remember, patience and attention to detail are your best tools in navigating appliance maintenance efficiently.