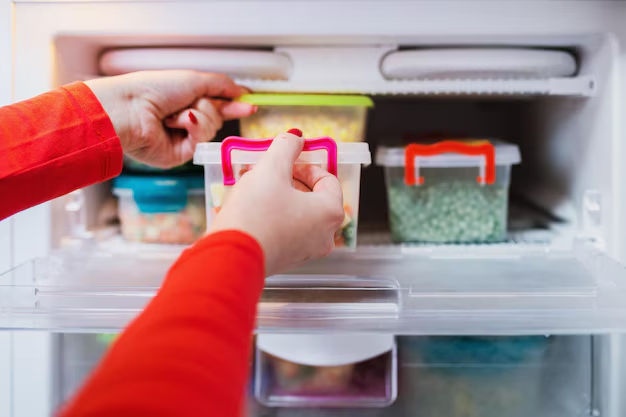
How to Effortlessly Remove Your Freezer Drawer from a Whirlpool Refrigerator 🔧
Having a Whirlpool refrigerator in your kitchen is a boon; it’s efficient, reliable, and gets the job done. But when it comes to maintenance tasks like removing the freezer drawer for cleaning or repair, things can seem daunting. This guide will walk you through how to safely and effortlessly remove the freezer drawer from a Whirlpool refrigerator, ensuring you maintain its performance and cleanliness without any hassle.
Why Remove the Freezer Drawer? ❄️
Before diving into the how-to, let’s understand why you might need to remove the freezer drawer. Regular maintenance of your Whirlpool refrigerator is essential to keep it in optimal working condition. Removing the freezer drawer can help in several scenarios:
- Cleaning: Over time, spills and crumbs can accumulate in the freezer, leading to odors and bacteria growth.
- Access: Sometimes you need better access to the back of the freezer, either for defrosting or checking on ice buildup.
- Repairs: Accessing certain parts of the freezer for repair might necessitate drawer removal.
- Replacement: In the event of a broken drawer or malfunctioning component, replacement might be unavoidable.
Tools You Might Need 🔨
While most Whirlpool freezer drawers are designed to be removed without any tools, having a few basic tools on hand can help:
- Phillips screwdriver: A common tool for loosening screws if needed.
- Flat-head screwdriver: Helpful in gently prying parts apart if they’re stubborn.
- Towel or rag: To catch any residual water or ice.
- Protective gloves: To keep your hands safe and warm.
Step-by-Step Guide to Removing the Freezer Drawer
Successfully removing the freezer drawer requires a clear, step-by-step approach. Below is a comprehensive guide to help you through this process.
Safety First: Preparing for the Task ⚠️
Before you embark on removing the freezer drawer, it's crucial to ensure safety:
Turn Off the Power: Unplug your refrigerator from the wall socket to ensure you’re working safely. This helps avoid electric shock or other hazards.
Empty the Freezer: Remove all the items from the freezer. This not only makes the drawer lighter but also prevents food from being damaged or thawed during the process.
Tackle the Frost: If your freezer has significant frost buildup, allow it to defrost first. You can speed this process by placing a bowl of hot water inside the freezer and closing the door for a short period.
Removing the Drawer: The Actual Process 🔩
Once you’ve prepared and secured the area, follow these steps to remove the drawer:
Step 1: Locate the Drawer Slide Mechanism
- Open the freezer door fully.
- Identify the slide rail system, usually found on both sides of the freezer drawer.
Step 2: Disengage the Drawer from the Slides
- Lift and Pull: Gently lift the drawer to disengage it from the slide rails. Pull it straight out.
- Watch for any locking clips that might need to be pressed to release the drawer completely.
Step 3: Release the Screws (If Necessary)
- Depending on the model, there may be screws holding the drawer to the slides. Use the Phillips screwdriver to remove them if needed.
Step 4: Remove the Drawer Completely
- Once detached, cautiously pull the drawer out of the tracks completely. Having a second set of hands can make this easier and prevent accidental drop.
After Drawer Removal: What’s Next? 🧼
With the drawer removed, you can take on cleaning and maintenance tasks:
Clean the Drawer: Use warm, soapy water to clean the drawer thoroughly, ensuring all debris and possible mold are removed.
Inspect for Damage: Look for cracks or any broken parts that could affect the drawer’s performance. Replace components if necessary.
Perform Repairs: If there are any repair tasks, now is the time to address vents, fans, or other components which may have been the cause for removal.
Tips for Re-Installing the Freezer Drawer 🔄
Once your cleaning or repairs are complete, reattaching the drawer is another pivotal step. Below are best practices to ensure everything fits back into place smoothly:
Align the Rails Properly: Before attempting to push the drawer back, make sure the slide rails are aligned correctly, sitting in their respective tracks.
Secure the Screws: If you removed screws during the disassembly, ensure you replace and secure them properly to avoid the drawer loosening later.
Test the Movement: Open and close the drawer a few times to ensure it operates smoothly without sticking or resistance.
Restore Power: Once everything is back in place, plug your refrigerator back in and ensure that both the cooling and the drawer are functioning correctly.
Troubleshooting Common Issues 🚧
Sometimes, even with perfect execution, issues may arise. Below are solutions for common problems faced during drawer removal and reinstallation:
Drawer Won’t Come Out: Double-check that all locks and screws have been properly disengaged. Ensure there’s no additional frost holding the drawer in place.
Drawer Doesn’t Align: This could be due to misalignment of tracks or debris within the rail system. Clean thoroughly and realign the drawer.
Drawer Won’t Close Properly: Ensure no items inside the freezer are protruding and obstructing the drawer closure. Additionally, verify that the rails and tracks are correctly aligned.
Handy Summary for Quick Reference 📋
Here’s a quick reminder checklist for removing and reinstalling your freezer drawer:
Before Removal:
- Power off the refrigerator.
- Empty and defrost the freezer.
- Gather necessary tools.
During Removal:
- Identify and disengage drawer slides.
- Remove screws if necessary.
- Pull out the drawer safely.
During Reinstallation:
- Align rails and check for obstructions.
- Secure any loose screws.
- Test drawer functionality.
- Restore refrigerator power.
By following these clear steps and tips, you can maintain your Whirlpool refrigerator with ease, ensuring it continues to serve you efficiently for years to come. Your refrigerator is an essential kitchen asset, and regular maintenance, such as removing and cleaning the freezer drawer, will help it operate smoothly and prolong its lifespan. 😊

