Troubleshooting and Resetting Your Whirlpool Refrigerator Ice Maker
Whirlpool refrigerators are renowned for their reliability and efficiency, but even the best appliances can experience occasional hiccups. One common issue many Whirlpool owners face is the ice maker malfunctioning or not producing ice as expected. When this happens, understanding how to reset your Whirlpool ice maker can save you time and frustration. In this comprehensive guide, we’ll walk you through the steps to reset your Whirlpool ice maker, explore tips to ensure it functions optimally, and consider what to do if further troubleshooting is needed.
🌟 Why Isn't My Whirlpool Ice Maker Working?
Before diving into reset procedures, it’s crucial to understand why your ice maker might not be working. Here are some typical reasons for malfunction:
- Power Issues: If your refrigerator lost power recently, it could interfere with the ice maker’s ability to function.
- Water Supply Problems: An interruption to the water supply could prevent ice production.
- Temperature Settings: If the freezer is not cold enough, ice production can be affected.
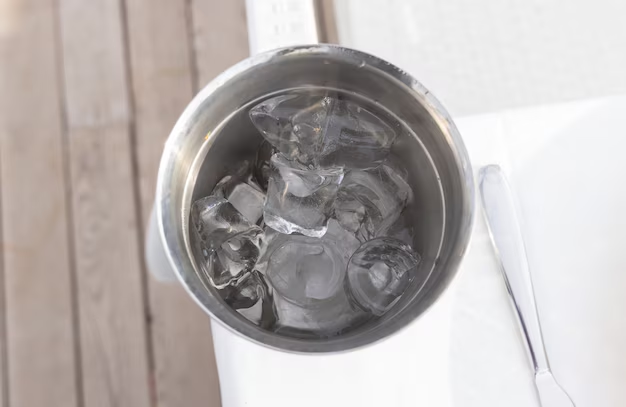
- Ice Blockages: Ice jams within the machine can halt production.
- Mechanical Failures: Components like the ice maker motor, ejector arm, or valve might need attention.
🔧 Resetting Your Whirlpool Ice Maker: Step-by-Step Guide
Step 1: Check the Power and Connections
Ensure the refrigerator is plugged in and has power. Verify that the power cord is firmly connected and the outlet is functioning correctly by testing another device.
Step 2: Locate the Ice Maker
Access the ice maker, which is typically located inside the freezer compartment. Depending on your model, it might be necessary to remove the ice bin to see the maker more clearly.
Step 3: Identify the Reset Switch or Button
Look for a reset switch or button on your ice maker. This is often found under the motor housing or near the front panel. In some Whirlpool models, the reset button may be replaced by a hole that you can gently insert a paperclip into to perform the reset.
Step 4: Conduct the Reset
Press and hold the reset button for about 10 seconds. If your model has the hole for resetting, insert a paperclip and gently hold it in place for the same duration. You should hear a chime or click, indicating the ice maker is resetting. Allow a few minutes for the complete reset process.
Step 5: Test Your Ice Maker
After resetting, give your ice maker some time (up to 24 hours) to start producing ice. If the process was successful, you should see ice cubes forming in the bin.
🧊 Tips for Maintaining Your Whirlpool Ice Maker
To avoid future issues, consider these maintenance tips:
- Regular Cleaning: Clean your ice maker every few months to prevent mineral buildup and ensure clean ice.
- Check the Water Filter: Ensure your water filter is not clogged and replace it every six months or as recommended by Whirlpool.
- Inspect the Water Line: Occasionally inspect the water line for kinks, leaks, or blockages.
- Temperature Settings: Keep your freezer at the recommended temperature, generally between 0°F and 5°F (-18°C and -15°C) for optimal ice production.
- Ice Bin Care: Regularly empty the ice bin to prevent old ice from sticking together and blocking new ice production.
🤔 When Resetting Isn't Enough: Further Troubleshooting
If your ice maker still isn't working after a reset, it may require additional troubleshooting:
Water Supply Issues
First, ensure your water supply line is properly connected and the valve is open. If you suspect a blockage or low water pressure, consider replacing the water filter or calling a plumber for an inspection.
Temperature Adjustments
Verify that the freezer and refrigerator temperatures are set appropriately. If they are too warm, the ice maker might be unable to maintain cold enough conditions to produce ice.
Mechanical Inspection
If you suspect a mechanical issue, inspect the ice maker’s parts for visible damage. Components such as the motor or ejector arm may need replacement if worn out.
Seeking Professional Help
When all else fails, calling in a professional technician is a reliable option. They can diagnose and fix issues that may not be easily addressed with a DIY approach.
🔑 Key Takeaways for Whirlpool Ice Maker Reset and Maintenance
Here’s a quick summary of the essential steps and tips for maintaining a smoothly functioning ice maker:
- Ensure Power Connectivity: Always verify the refrigerator is plugged in and operational.
- Perform Regular Cleaning: This helps avoid mineral buildup and ice blockages.
- Monitor Temperature Settings: Keep the freezer at optimal temperatures for ice production.
- Check and Replace the Water Filter: A clogged filter can hinder water flow, affecting ice production.
- Reset as Needed: When troubleshooting, reset the ice maker when issues arise.
🚀 Wrapping It Up
By understanding how to reset your Whirlpool refrigerator’s ice maker and adopting regular maintenance practices, you can ensure your appliance runs efficiently. While issues can occasionally occur, taking proactive steps can often prevent significant problems, saving you time and a call to the repair service. Keep your ice maker in top shape, and enjoy uninterrupted ice production for your home’s convenience.