Keep Your Garage Fridge Running Smoothly: How to Install a Refrigerator Heater Kit
Picture this: it’s the dead of winter, and you fancy a cold drink from the garage fridge. But when you open the door, the light comes on, yet everything inside is room temperature. If your refrigerator is in an unheated garage, it might be falling victim to the cold conditions that can prevent it from cooling effectively. Fear not! A refrigerator heater kit can solve this problem by keeping your appliance active and functional despite the chilly garage environment.
In this guide, we will walk you through everything you need to know about installing a garage refrigerator heater kit—from understanding why it's needed to a step-by-step installation process. Whether you’re a seasoned DIY enthusiast or a novice, this comprehensive guide has got you covered.
Why a Refrigerator Heater Kit is Essential for Your Garage
The Garage Environment Challenge
Garages aren’t just for cars. They also serve as additional space for storage, workshops, and sometimes even spare appliances like refrigerators. While having a fridge in the garage can be incredibly convenient, this environment presents unique challenges. Many standard refrigerators are designed to operate efficiently within a typical indoor range of 60-80°F. However, garages often experience varying temperature extremes— notably dropping well below freezing during winter.
How Temperature Affects Your Fridge
When temperatures plummet, the thermostat in your refrigerator might read the low ambient temperature and assume that the fridge is sufficiently cold, inadvertently turning off the cooling system. This can prevent the freezer section from maintaining its temperature, spoiling your frozen goods. A refrigerator heater kit acts as a smart buffer, tricking the thermostat into activating the cooling system to keep your freezer cold.
Preparing to Install a Garage Refrigerator Heater Kit
Equipment Needed
Before diving into the installation process, gather the following:
- Garage Refrigerator Heater Kit: Ensure that it's compatible with your specific model.
- Screwdriver Set: Often includes Phillips-head, flat-head, and small precision screwdrivers.
- Multimeter: For checking electrical connections.
- Protective Gloves and Safety Glasses: Safety first!
- Manual and Kit Instructions: Follow these carefully throughout the process.
Assessing Compatibility
Not all refrigerators are suited for a heater kit. Consult your refrigerator’s manual or the manufacturer’s website to check if your model supports the installation of a heater kit. Pro Tip: Look for energy-efficient models often designed for broader temperature ranges.
Step-by-Step Installation Guide
Step 1: Safety First
Turn Off and Unplug: For your safety, always unplug the refrigerator before commencing any work. Additionally, avoid installing the heater kit in a wet or damp environment to prevent electrical hazards.
Step 2: Access the Thermostat
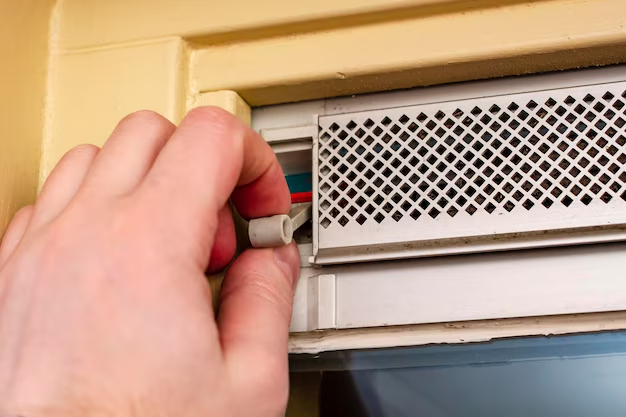
Locate the Thermostat: This is typically located inside the refrigerator compartment, often behind a protective panel or cover.
Remove the Cover: Using the appropriate screwdriver, carefully remove any screws or clips holding the thermostat cover in place.
Step 3: Installing the Heater Kit
Position the Heater Element: The heater kit usually consists of a small heating coil or pad. Position this on or around the thermostat ensuring it sits securely but does not obstruct other components.
Follow Instructions: Each heater kit model may vary slightly in installation. Follow the product-specific instructions provided with your heater kit.
Step 4: Wiring the Heater
Connect the Heater Wires: Typically, this involves connecting the heater's wires to power or control circuits within the refrigerator. This step may require lightly unscrewing the thermostat or control board to access the necessary wiring points.
Secure Connections: Use electrical tape or connectors to ensure all wires are firmly and safely connected.
Step 5: Reattach and Secure
Replace the Thermostat Cover: Once installation is complete, carefully replace any covers or panels initially removed. Ensure all screws and fittings are securely fastened.
Step 6: Test the Setup
Power On: Plug the refrigerator back in and adjust the settings on the thermostat to a suitable temperature. Monitor the performance over a couple of days to ensure the heater is functioning as expected.
Maintaining Your Garage Refrigerator
Regular Monitoring
Occasionally check the temperature within the refrigerator and freezer compartments to ensure consistency. This is especially important during extreme weather changes.
Energy Efficiency Tips
To avoid unnecessary energy consumption:
- Insulate Your Garage: This helps in reducing drastic temperature fluctuations.
- Position Wisely: Keep the fridge away from direct sunlight or heat sources.
- Periodic Maintenance: Regularly clean and defrost the freezer to maintain efficiency.
Frequently Asked Questions
❓ Will a heater kit increase my electricity bill?
While a heater will consume additional energy, it's generally minimal compared to the cost of spoiled food. Ensuring your refrigerator runs efficiently can help mitigate some increased energy usage.
❓ Are there alternative solutions?
In insulated or temperature-controlled garages, a heater kit may not be necessary. Also, specifically designed “garage-ready” refrigerators can withstand wider temperature ranges.
Key Takeaways 📝
- Refrigerator Heater Kits: Essential for maintaining functionality in non-temperature-controlled garages.
- DIY Installation: Simple and accessible for even beginner DIY enthusiasts.
- Energy Efficiency: Monitor and maintain your refrigerator regularly to optimize performance and energy use.
Final Thoughts
Installing a garage refrigerator heater kit can keep your fridge functional even in the coldest environments. By following the steps above, you not only safeguard your food but also enhance the utility of your garage. This proactive measure ensures that your refrigerator operates smoothly, regardless of the season—providing peace of mind and a continual supply of fresh and frozen goods at your fingertips.
With insight into the installation process, you’re now ready to tackle this project head-on. Remember, a few careful steps can extend the lifespan of your appliances and enhance their performance in challenging settings. Here's to many more refreshing beverages and preserved meals from your garage fridge! 🍹🌟