Mastering the Art of Installing a Refrigerator Door Gasket: A Step-by-Step Guide
Installing a new refrigerator door gasket might seem like a daunting task at first, but with the right guidance, it's a straightforward process that you can accomplish with confidence. A properly sealing gasket ensures your refrigerator operates efficiently, saving both energy and money while keeping your food fresh. Dive into this comprehensive guide to understand every aspect of gasket replacement, from recognizing the signs of wear to executing the perfect installation.
❓ Why Replace Your Refrigerator Door Gasket?
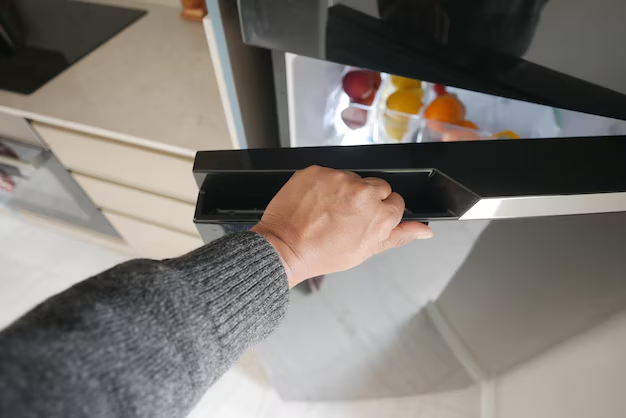
A refrigerator door gasket is the rubber seal that creates an airtight barrier between the door and the fridge's main compartment. Over time, this gasket can become worn or damaged, leading to energy loss and poor cooling.
Key Indicators for Replacement
- Visible Cracks or Tears: Inspect the gasket for any physical damage that could break the seal.
- Persistent Condensation: Excess moisture inside the refrigerator could be due to a failing gasket.
- Increased Energy Bills: A faulty gasket may cause the fridge to work harder, leading to higher energy consumption.
- Difficulty in Closing the Door Properly: A misaligned or damaged gasket can prevent the door from sealing securely.
🔧 Tools and Materials You’ll Need
Before starting the installation, gather the necessary tools and materials:
- New refrigerator door gasket (ensure compatibility with your refrigerator model)
- Screwdriver or nut driver
- Phillips head screwdriver
- Warm, soapy water and a sponge or cloth
- Hairdryer or warm cloth (optional for easing installation)
- Towels or rags to catch any spills
📋 Step-by-Step Installation Process
1. Purchase the Correct Gasket
Start by identifying the make and model of your refrigerator to purchase the correct gasket. This is crucial as not all gaskets are universal. Match the specifications with your fridge to avoid any fitting issues.
2. Preparation for Replacement
Empty the Door Contents: Clear all items from the door shelves to prevent any accidental damage or spills.
Turn Off the Refrigerator: For safety and to save energy, switch off the refrigerator before beginning the gasket replacement process.
3. Remove the Old Gasket
Locate the Fasteners: The gasket is typically held in place by screws or clips. Gently peel back the gasket to reveal these fasteners.
Unscrew or Unclip the Gasket: Using a screwdriver or nut driver, remove the fasteners. Keep these components safe for later reattachment.
Remove the Gasket from the Track: Carefully pull the gasket free from the door. Take care not to damage the track, as it will house the new gasket.
4. Prepare the New Gasket
Flatten the Gasket: In cases where the new gasket is kinked or compressed from shipping, use a hairdryer on a low setting to warm it up, or immerse it in warm water. This helps it regain shape, ensuring a better fit.
Check for Damages: Before installation, inspect the new gasket for any manufacturing defects or damages that might affect its performance.
5. Installation of the New Gasket
Fit the New Gasket into the Track: Start at one corner and gently press the new gasket into the track. Ensure a snug fit before proceeding along the perimeter of the door.
Secure with Fasteners: Reattach the screws or clips to secure the new gasket. Check that the gasket is not twisted and sits evenly in the track.
6. Final Adjustments and Checks
Perform a Seal Check: Close the refrigerator door and inspect the seal. The door should close effortlessly, and there should be no gaps between the gasket and the fridge body.
Adjust if Necessary: If the door doesn’t seal correctly, check the alignment of the gasket in its track and readjust as needed.
7. Clean Up and Restore Power
Wipe Down the Area: Clean any debris or water around the door frame and gasket area.
Restore Power and Replace Shelves: Once satisfied with the installation, turn the refrigerator back on and reload the door shelves.
🤔 Common Questions and Concerns
How Often Should You Replace the Gasket?
There's no set lifespan for a refrigerator gasket, as longevity depends on usage and maintenance. However, consider inspecting it annually and replacing it when it shows signs of wear or damage.
Is Professional Help Needed?
While DIY installation is feasible for many, those uncomfortable with the task or who face difficulties can hire professional services. Expert installation ensures a perfect fit and optimal performance.
📝 Essential Insights and Tips
- Regular Maintenance: Clean the gasket monthly with warm, soapy water to prevent grime build-up that can compromise the seal.
- Avoid Harsh Chemicals: Cleaning agents that are abrasive can damage the gasket material.
- Mind the Magnet: Gaskets often contain magnets. Ensure these are intact and strong enough to maintain the seal.
📌 Quick Reference: Installing a Refrigerator Door Gasket
| Step | Description |
|---|---|
| Identify the Problem | Check for signs of a faulty gasket such as tears, condensation, or energy loss. |
| Gather Tools | Collect necessary tools like screwdrivers, towels, and the new gasket. |
| Remove Old Gasket | Unscrew and carefully peel away the old gasket. |
| Prepare New Gasket | Flatten and inspect the new gasket for damage. |
| Install New Gasket | Fit it into the track starting at one corner and secure with fasteners. |
| Check and Adjust | Ensure a tight seal. Adjust alignment if there are gaps. |
| Clean and Restore Power | Wipe down the area and turn the refrigerator back on. |
🛠️ In Conclusion
Replacing a refrigerator door gasket is a manageable and rewarding DIY project. Maintaining an airtight seal keeps your refrigerator functioning efficiently and helps in cutting down energy costs. By following this guide, you can ensure successful installation, prolong the life of your refrigerator, and contribute to a more sustainable home environment. So, roll up your sleeves, grab your tools, and take the first step towards a more efficient kitchen!