Simplifying Refrigerator Water Line Removal: A Comprehensive Guide
Is your refrigerator water line due for a change, or perhaps it’s time to remove it entirely? Whether you're upgrading, doing maintenance, or exploring a shift to a simpler, non-water dispensing model, understanding how to remove the water line from your refrigerator is essential. This process, while straightforward, demands a careful approach to avoid kitchen chaos. Let's explore the steps involved, share practical tips, and delve into related topics for peace of mind during your kitchen project.
Understanding the Purpose of a Refrigerator Water Line
The Functionality of a Water Line
A refrigerator water line connects your appliance to a water source, providing water for chilled drinks and automatic ice-making. It eliminates the need for manual filling, adding convenience to daily routines. Yet, if this line begins to leak or encounters a blockage, it can become a source of frustration rather than comfort.
Reasons to Remove the Water Line
- Upgrading Appliances: Perhaps you're purchasing a refrigerator without water dispensers or ice makers.
- Maintenance and Repair: Addressing leaks or blockages often necessitates removing the line.
- Kitchen Renovations: Shifting kitchen layouts may require disconnecting the line temporarily.
- Simplification: Reducing potential water damage risks by using standalone water filters instead.
Now that we recognize why a water line might need removal, let’s dive into how to execute this process efficiently.
Step-by-Step Guide to Removing a Water Line
Preparing for the Process
Before beginning, ensure you have the necessary tools and a clear understanding of the task at hand.
Tools Required:
- Adjustable wrench
- Towel or small bucket
- Flathead screwdriver
- Shut-off valve key (if applicable)
Safety Tips:
- Unplug the Refrigerator: Always disconnect the power to avoid electrical hazards.
- Turn Off the Water Supply: Locate the shut-off valve, usually situated beneath the sink or in the basement, and turn it off to prevent leaks.
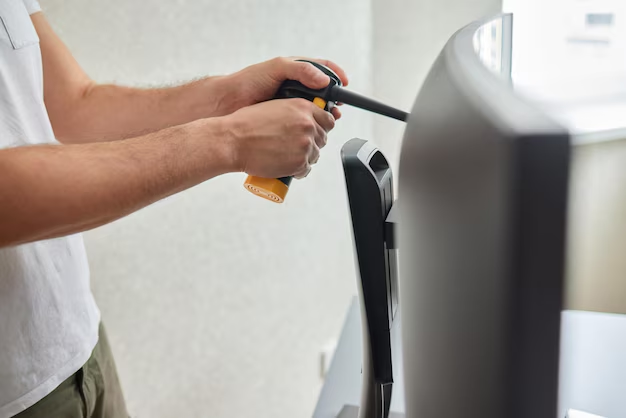
Removing the Water Line
Step 1: Access the Water Line
- Move the Refrigerator: Carefully slide the appliance away from the wall to expose the water line at the back.
- Locate the Connection Point: Identify where the line meets the refrigerator’s water inlet valve, typically secured with a compression nut.
Step 2: Disconnect the Line
- Use the Wrench: Loosen the compression nut using the adjustable wrench. Proceed gently to avoid damaging any components.
- Detach the Line: Once loosened, pull the line away from the valve. Place a towel or bucket underneath to catch any residual water.
Step 3: Secure the Open End
- Cap the Line: If you aren’t installing a new line, cap the open end to prevent leaks. A simple push-fit cap can do the trick.
- Check for Leaks: With the valve capped, turn the water supply back on briefly to ensure there are no leaks.
Troubleshooting Common Issues
- Stuck Connection: Apply mild force with the wrench if the nut is stubborn. Avoid excessive twisting to prevent breaking.
- Leaks Post-Removal: Verify that the cap is properly affixed or consider replacing it with a more secure fitting.
Expanding Your Understanding
Types of Water Lines
Water lines vary in material, commonly available in plastic, copper, or stainless steel forms. Each type bears strengths and weaknesses:
- Plastic (PVC): Economical, easy to work with, but can be prone to cracking.
- Copper: Durable, resists bacteria, but requires precise cutting and fitting.
- Stainless Steel: Strong and less prone to leaks, but more expensive.
Maintenance Tips for Refrigerator Water Lines
- Regular Inspections: Semi-annual checks for punctures or kinks can avert future issues.
- Proper Installation: Ensuring all seals and connections are tight can prevent leaks over time.
- Quality Materials: Investing in durable materials like copper or stainless steel offers long-term reliability.
Alternate Solutions and Considerations
Filtering Systems Without Built-in Lines
For those opting to remove the water line for good, consider alternatives like countertop water filters or standalone ice makers, which offer similar benefits without the plumbing.
Professional Installation Services
If you’re hesitant about delving into a DIY approach, professional services assure correct removal and reinstallation, underscoring peace of mind amidst demanding kitchen adjustments.
Inclusive Summary: Key Takeaways
To encapsulate the essentials, let's review a brief, handy guide on tackling water line removal:
- 🔌 Unplug First: Ensure safety by disconnecting the appliance power.
- 🚰 Shut the Water Off: Turn off the shut-off valve to eliminate spill risks.
- 🔧 Gear Up: Have wrenches and towels at hand for a smooth process.
- 🛠️ Disconnection Done Right: Use gentle turns to unscrew compression nuts.
- 🧤 Stay Leak-Free: Cap unused connectors immediately.
By adhering closely to these steps, you’ll remove your refrigerator water line with minimal stress and disruption.
Wrapping Up the Process
Removing a refrigerator water line can appear daunting, yet with systematic preparation and this comprehensive guide at your disposal, the task becomes considerably more approachable. Remember to exercise patience and care throughout your project, ensuring optimal functionality and a hassle-free kitchen experience. Whether you're maintaining, upgrading, or simplifying, your knowledge thus empowers a prudent and proficient operation.