Connecting Your Refrigerator to a Water Line: A Step-by-Step Guide
Congratulations on getting a new refrigerator with an ice maker and water dispenser! Now, to enjoy that refreshment, you need to attach a water line to your refrigerator. Whether you're a first-time homeowner or a seasoned DIY enthusiast, this guide will illuminate every aspect of attaching a water line to your refrigerator, ensuring you have the knowledge and confidence to tackle the task. Let's dive in and make sure you get that refreshing glass of water and crisp ice cubes.
Why Connect a Water Line to Your Refrigerator?
Ice Makers and Water Dispensers: Modern refrigerators come equipped with ice makers and water dispensers, offering convenience and quick access to cool drinks and ice.
Cost Efficiency: Making ice at home as opposed to purchasing bags can be more cost-effective over time.
Freshness and Convenience: Enjoy fresh, chilled water directly from your refrigerator’s dispenser without the need for multiple water bottles cluttering your space.
What You'll Need
Before getting started, gather all necessary tools and materials:
- Flexible tubing: Either plastic or copper tubing for the water supply line.
- Water line installation kit: Includes a piercing valve, compression fittings, and a saddle valve.
- Adjustable wrench: Essential for securing and tightening connections.
- Drill and drill bits: Useful for making holes for mounting, if necessary.
- Bucket or towel: To catch any water spills during installation.
Step-by-Step Guide to Attaching a Water Line
Step 1: Identify the Water Source
Locate the Nearest Cold Water Supply: Ideally, this supply line should be under a sink or near the refrigerator.
Step 2: Turn Off the Water Supply
Ensure Safety First: Always turn off the water supply where you'll be connecting the line to avoid unwanted leaks or pressure mishaps.
Step 3: Install the Saddle Valve
Attach the Saddle Valve: Use a saddle valve to tap into a nearby cold water pipe.
- Clamp the valve over the pipe and tighten the screws.
- Use a drill to pierce a hole through the pipe using the saddle valve.
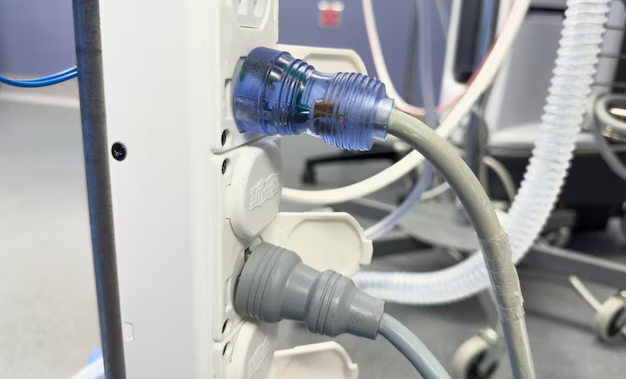
Step 4: Connect the Water Line
Attach Tubing: Use the flexible tubing included in your installation kit.
- Insert one end of the tubing into the saddle valve and secure with a compression fitting.
- Tighten with an adjustable wrench.
Step 5: Connect the Tubing to the Refrigerator
Secure Connection: Attach the other end of the tubing to the inlet valve of your refrigerator.
- Slide the compression nut onto the tubing followed by a ferrule (a small ring).
- Insert the tubing into the refrigerator’s water inlet fitting and tighten the compression nut.
Step 6: Turn On the Water Supply and Check for Leaks
Safety Check: After all connections are secured, turn the water supply back on.
- Check for leaks at both the saddle valve and the refrigerator. If leaks are observed, tighten the connections slightly more.
Tips for a Smooth Installation
- Use a Bucket or Towel: Keep a bucket or towel handy to catch any water drips while making connections.
- Avoid Overtightening: This can damage fittings and lead to leaks.
- Choose the Right Tubing: Copper tubing is more durable, while plastic is easier to handle.
Common Mistakes to Avoid
- Skipping the Water Supply Turn Off: Ensuring the water is turned off prevents a flooded kitchen.
- Wrong Tubing Length: Measure twice, cut once. Always ensure enough slack is available without being excessive.
- Loose Fittings: Avoid hand-tightening alone. Use wrenches to ensure fittings are snug.
Related Considerations
Water Filtration Systems
Many refrigerators have built-in filters that should be regularly changed. Consider adding an external water filter for better quality and extended appliance life.
Professional vs. DIY Installation
While DIY can save money, hiring a professional can ensure everything is correctly installed. Consider your comfort level and the complexity of the project before proceeding.
Summary and Key Takeaways
Installing a refrigerator water line can be straightforward with the right tools and guidance. Here’s a handy summary to help you remember the essentials:
- Identify and Turn Off: Locate cold water supply and shut it off.
- Valve and Tubing: Install a saddle valve and connect flexible tubing.
- Secure Fittings: Attach tubing to refrigerator and ensure all connections are tight.
- Check for Leaks: Turn the water back on and monitor for leaks.
- Pro vs DIY: Evaluate if professional installation is preferred based on your skill level.
🔧 Essentials to Remember:
- Turn off water before starting.
- Make precise, secure connections.
- Choose correct tubing: copper for durability, plastic for flexibility.
✨ Pro Tip: Regularly check and replace water filters for clean and fresh tasting water and ice.
By following these steps, you'll soon enjoy the seamless comfort of your refrigerator's ice-maker and water dispenser. Whether you opt for a professional installation or embrace the DIY spirit, ensure that you adhere to safety precautions. Enjoy the refreshing benefits of your efforts, and cheers to a job well done!