Effortlessly Change the Water Filter in Your Whirlpool Side-by-Side Refrigerator
For those who own a Whirlpool side-by-side refrigerator, ensuring a constant supply of fresh, clean water and ice is vital. One of the simplest yet most essential tasks for maintaining your appliance is changing its water filter. In this comprehensive guide, we walk you through everything you need to know to ensure your Whirlpool refrigerator continues to provide you with the freshest water and ice possible.
Why Change Your Water Filter Regularly?
Changing your refrigerator's water filter is important for several reasons:
- Maintains Water Quality: Over time, filters can become clogged with contaminants, leading to less effective filtration. Regular replacement ensures continued removal of impurities like chlorine, lead, and other particles that can affect taste and safety.
- Avoids Buildup: Replacing the filter helps prevent mineral and sediment buildup in the water system, which can reduce efficiency and cause other issues.
- Prolongs Refrigerator Life: Regular maintenance, like changing filters, supports overall appliance longevity.
Determining When to Replace Your Water Filter
Whirlpool generally recommends changing the water filter every six months. This timeline can depend more specifically on the following factors:
- Water Quality: If your local tap water contains higher levels of sediment or impurities, more frequent changes might be necessary.
- Usage: Families that use a significant amount of filtered water daily might need to replace their filters more often.
- Smart Features: Many modern Whirlpool refrigerators come with a filter indicator light, making it easier to know when a change is due. Keep an eye on this to stay on schedule.
Understanding Your Whirlpool Water Filter Type
Before diving into the replacement process, it's important to identify the exact filter type your Whirlpool fridge uses. Here are some common types:
- EDR1RXD1: Often found in side-by-side models with a top freezer.
- EDR2RXD1: Fits bottom freezer and French door models.
- EDR3RXD1: Typically used in older side-by-side models.
Refer to your user manual or the existing filter to verify the correct model number if you’re unsure.
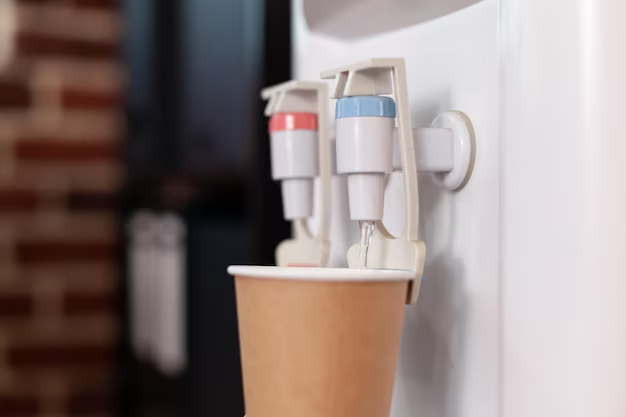
Step-by-Step Guide: How to Change Your Whirlpool Water Filter
Changing your filter is a straightforward process. Here's how to do it efficiently:
Preparing for the Change
Purchase the Correct Filter: Ensure you have the correct filter model. Buying genuine Whirlpool replacement filters is recommended for optimal performance.
Gather Supplies: You might need a dish towel or small container in case of water leakage.
Turn Off Ice Maker: Prevent potential damage by turning off the ice maker via the control panel.
Steps to Replace
Locate the Filter: It's usually located in the upper right corner inside the refrigerator or behind the base grille.
Remove the Old Filter:
- For top-right corner filters: Twist the old filter counterclockwise and pull it straight out. Some water may drip, so have a towel handy.
- For grille-mounted filters: Press the eject button. If no button is available, twist the filter counterclockwise to release it.
Insert the New Filter:
- Align the filter with the opening and push it straight in. Twist it clockwise until it locks into place. If installing a grille-mounted filter, ensure it snaps tightly into place.
Secure and Run:
- Turn the ice maker back on.
- Run about two gallons of water through the dispenser to clear any trapped air and prime the new filter.
Post-Installation Steps
- Check for Leaks: Examine the installation area to ensure there's no water leakage.
- Reset the Indicator Light: Hold the water filter button or corresponding reset button to update the filter status. Refer to the fridge manual for specific instructions.
Common Concerns and Troubleshooting
While changing the water filter, you might encounter some common issues. Here are solutions to a few of them:
- Filter Won't Lock in Place: Ensure it's fully aligned with the fitting. Sometimes, wiggling it gently while pushing in place helps.
- Water Pressure Drops: Run additional water through the dispenser if pressure is weak after installation. This can help clear air blocks.
- Unpleasant Taste or Odor: Ensure you're using a compatible, high-quality filter. Run more water through to flush the lines.
Related Maintenance Tasks
While you’re tending to your water filter, consider incorporating these additional tasks to keep your refrigerator running smoothly:
Clean the Refrigerator Coils
Dust and debris on coils can decrease efficiency. Vacuum or brush them gently every six months.
Check the Door Seals
Wipe seals with a damp cloth to keep them pliable and ensure they form a tight seal.
Organize and Declutter
Regularly review the contents of your fridge for expired items and maintain customary space free to promote air circulation.
Quick Tips for Whirlpool Refrigerator Care 🛠️
To sum up, here’s a skimmable list of essential tips to remember:
- 🔄 Regular Filter Change: Every six months or per your fridge's alert system.
- 💧 Run Initial Water: After replacing the filter, run two gallons through to clear air.
- 📆 Check Coils and Seals: Conduct coil cleaning and seal inspection biannually.
- ❄️ Ice Maker: Turn off before filter changes to avoid malfunctions.
Conclusion: Keep It Fresh, Keep It Clean
Maintaining fresh, clean water is a simple but impactful part of home appliance care. By following these steps to change your Whirlpool side-by-side refrigerator's water filter, you ensure that every glass of water and batch of ice maintains the high quality you expect. Remember, routine maintenance not only prolongs the refrigerator's life but also assures quality taste, peace of mind, and a better experience with every use. Cheers to optimal home living!