Mastering the Art of Dry Aging Beef at Home: A Complete Guide
Imagine savouring a steak that's both rich and complex, with a depth of flavor that rivals the best steakhouse offerings. This culinary dream can be a reality in your own kitchen through the process of dry aging beef. This technique is traditionally associated with professional butchers and high-end restaurants, but with the right knowledge and precautions, you can achieve this at home — right in your refrigerator. Let's delve into the essential aspects of dry aging beef, exploring each step in detail to ensure you achieve a delicious result.
🌟 Why Dry Age Beef at Home?
Dry aging beef is a time-honored practice where beef is stored in a controlled, chilled environment for several weeks to allow for natural enzymes to break down muscle tissue, resulting in enhanced tenderness and concentrated flavor. It not only enhances the taste but also jazzes up the texture of the meat, making it buttery and succulent. Here’s why you might consider dry aging at home:
- Cost Efficiency: Dry aging at home can be more economical compared to purchasing from high-end restaurants.
- Flavor Customization: You have full control over the duration and conditions to suit your specific taste preferences.
- Satisfaction: Playing the role of a maître d' and chef brings its own unique sense of accomplishment.
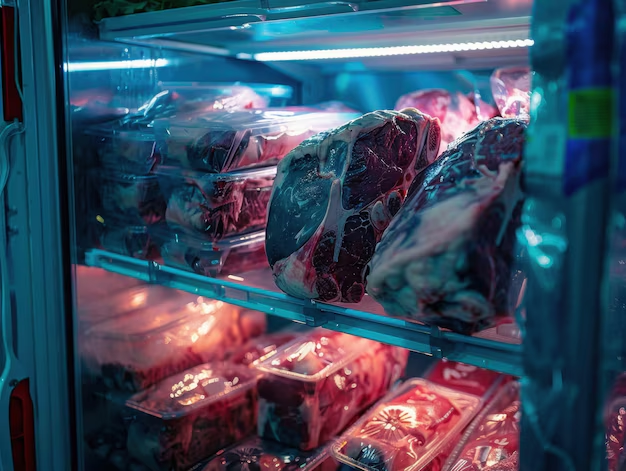
🥩 Choosing the Right Cut
The journey begins with selecting the right cut of beef. Not all cuts are ideal for dry aging. Here's a bullet-point guide to help you choose:
- Bone-In Subprimals: Such as ribeye, strip loin, or short loin. Bone-in cuts preserve moisture and ensure even aging.
- Prime Grade: Look for well-marbled beef (like USDA Prime or Choice), as the fat renders beautifully during aging.
- Purchase from a Reputable Source: Ensure you're purchasing high-quality beef from a trusted butcher or supplier.
By choosing the right cut, you lay a solid foundation for the aging process, paving the way for a stellar result.
🧊 Preparing Your Dry Aging Fridge
Once you have your cut, the next step involves setting up the environment to dry age. This process is all about control — temperature, humidity, and air circulation must be just right.
Essential Equipment You’ll Need
- Dedicated Fridge or Cooler: To maintain consistent temperature and prevent cross-contamination.
- Thermometer: To ensure a steady environment around 34-38°F (1-3°C).
- Hygrometer: For monitoring humidity, ideally between 80-85%.
- Wire Rack: Placed in the fridge to ensure airflow around the beef.
- Fan: To facilitate air circulation within the fridge.
Setting Up
- Clean Thoroughly: Sanitize the fridge and remove any items that could impart odors.
- Position the Rack: Place the wire rack so the beef will sit with ample airflow on all sides.
- Install a Fan: Position it to encourage air movement, crucial for preventing mold.
- Ensure Steady Conditions: Regularly check the thermometer and hygrometer to maintain optimal levels.
👩🍳 The Dry Aging Process: Step by Step
Initial Setup
- Unwrap the Beef: Remove any plastic wrapping to allow the beef to breathe.
- Position on the Rack: Place the beef on the wire rack, ensuring it doesn't touch any surface besides the rack.
Monitoring and Maintenance
- Check Regularly: Monitor temperature and humidity daily.
- Inspect the Beef: Look for any signs of mold growth; a light white coat is normal, but anything unusual, especially black or green mold, is not.
- Trim the Surface: After your desired aging period (21-60 days is common), trim away the hardened outer layer.
Aging Times and Expectations
- 21 Days: An initial mellowing of flavor and some tenderness.
- 30-45 Days: Intensified flavors that are slightly nutty.
- 60 Days or More: Highly concentrated flavors with a robust taste profile.
✂️ Post-Aging Preparation
Once your beef has reached the preferred age, it’s time to get it ready for cooking:
- Trim with Care: Using a sharp knife, remove any crusty exterior that developed during aging.
- Portion the Steaks: Slice into the desired number of portions.
- Final Touches: Allow the steak to reach room temperature before cooking for even heat distribution during grilling or searing.
🍽️ Cooking Your Dry Aged Beef
Now, onto the star moment – cooking. Since dry-aged beef is packed with flavor, the cooking method should amplify its natural qualities:
- Season Simply: Salt and pepper can be all you need. Minimal seasoning lets the beef’s natural taste shine through.
- Choose Your Cooking Method: High-heat cooking methods like grilling, pan-searing, or broiling work wonders.
- Use a Meat Thermometer: This ensures precision. Aim for about 130°F (54°C) for medium-rare, considering the beef will continue to cook slightly after removing from heat.
📝 Key Takeaways and Tips
Here's a quick summary of essential points and expert tips to keep handy:
- 🎯 Choose Right: Opt for bone-in, well-marbled cuts.
- ⏳ Time it Right: Patience pays off for depth of flavor.
- 🧼 Sanitize: Maintain a clean and odor-free fridge.
- 🛠️ Essential Tools: Have a thermometer, hygrometer, and fan for dry aging success.
- 🍽️ Simplicity in Cooking: Let the rich flavors of dry-aged beef be the highlight.
Conclusion: Your Culinary Adventure Awaits
Embarking on the journey of dry aging beef at home might seem daunting, but with attention to detail and a bit of patience, the rewards are immense. The final result is a gourmet experience tailored to your taste, offering flavors and textures that are unforgettable. Whether you're a seasoned home cook or just eager to explore new culinary grounds, dry aging beef could be the perfect next chapter in your food story.
Your guests and taste buds will thank you for it! Bon Appétit!