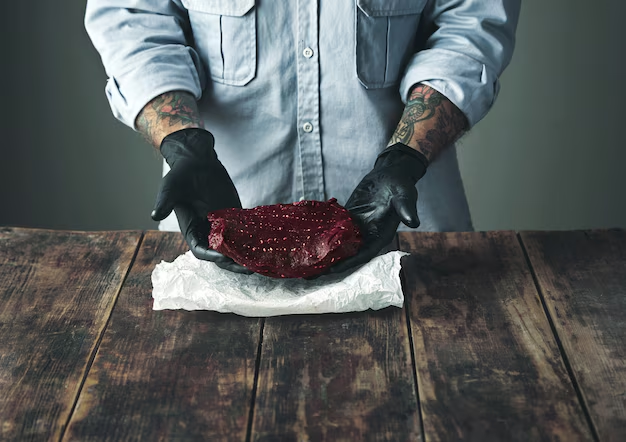
Unlock the Secrets of Restaurant-Quality Steaks: How to Dry Age Steak in Your Refrigerator
Imagine achieving restaurant-quality steaks right in your home. Dry aging, a process renowned for deepening the flavor and tenderness of meat, might seem exclusive to upscale steakhouses, but you can actually do it at home! This comprehensive guide will walk you through everything you need to know about dry aging steak in your refrigerator, ensuring you get succulent, flavorful steaks every time.
What is Dry Aging? 🌿
Dry aging is a process where beef is stored in a controlled, chilled environment over several weeks. During this time, enzymes break down muscle tissue, enhancing tenderness and flavor.
Benefits of Dry Aging
- Enhanced Flavor: Aging beef allows enzymes to enhance the beef's natural flavor, giving it a distinct taste that many steak lovers adore.
- Improved Tenderness: As enzymes work on the muscle fibers, the meat becomes softer and more tender.
- Moisture Loss: Reduces excess water, intensifying the beef’s natural flavors.
Preparing for Dry Aging at Home 🏡
Before you jump in, ensure you have the right setup for dry aging at home.
Choosing the Right Cut
- Bone-In Ribeye or Strip Loin: These are popular choices among enthusiasts. The bone and fat cap help protect and flavor the meat during aging.
- Quality Matters: Opt for higher-grade beef to start with; the process enhances, not masks, its quality.
Setting Up Your Aging Environment
- Dedicated Fridge: Ideally, use a separate fridge to avoid contamination and maintain dryness. Temperature should be consistently around 34°F to 38°F.
- Airflow and Humidity: Ensure airflow to prevent mold growth, and maintain humidity around 80%.
- Wire Rack: Place meat on a rack for maximum air circulation.
Step-by-Step Guide to Dry Aging 🍽️
Preparation
- Pat the desired cut of meat dry with paper towels.
- Do not season or trim before aging; this will be done after the process.
Storage
- Place the meat on the wire rack with a drip pan beneath.
- Store in your dedicated fridge; position away from any air vents.
Aging Duration
- 7 Days: Noticeable tenderizing but mild flavor development.
- 14 Days: Good balance of tenderness and flavor.
- 21 Days or More: A more intense flavor, preferred by those who enjoy the robust taste of aged beef.
Final Steps
- After the desired aging period, trim the dried, hardened outer layer.
- The remaining beef inside should be deep red, with a strong meaty aroma.
Understanding the Science Behind Dry Aging 🔬
Enzymatic Breakdown
During aging, natural enzymes break down proteins and fats, which results in:
- Proteolysis: This process softens the beef by breaking down tough muscle fibers.
- Fat’s Role: As enzymes act on fats, they contribute to flavor development.
Moisture Loss
Aging results in weight loss due to moisture evaporation:
- Concentrated Flavor: Less water means a denser, beefy flavor.
- Crust Formation: The outer crust helps lock in the inner juices and flavors.
Safety Considerations 🛡️
Dry aging at home should be approached with caution to ensure food safety:
Hygiene and Safety Tips
- Clean Environment: Regularly clean the fridge to prevent bacterial growth.
- Consistent Temperature: Too warm and you risk spoilage; too cold might slow down the enzymatic process.
- Regular Checks: Inspect the beef frequently for unwanted mold or off-odors.
Recognizing Spoilage
- Unnatural Odor: Should smell earthy and beefy; any sour or funky odor indicates spoilage.
- Unusual Colors: Bright green, blue, or black mold is a deal-breaker.
Enhancing Your Steak Experience 🔥
Once your dry aging process is complete, here’s how to maximize your steak’s flavor:
Cooking Your Aged Steak
- Room Temperature: Allow the steak to reach room temperature for even cooking.
- Simple Seasoning: Light seasonings let the aged flavor shine through—salt and pepper are usually sufficient.
- Searing Technique: Use high heat for a perfectly seared crust, then finish cooking in the oven or on a cooler part of the grill.
Serving Suggestions
- Resting Time: Let the steak rest post-cooking to redistribute juices.
- Side Dishes: Pair with simple sides like roasted vegetables or a fresh salad to complement the rich steak.
Troubleshooting Common Issues 💡
Despite the effort, sometimes things may not go as planned. Here are solutions for common challenges:
Issue #1: Insufficient Aging Flavor
- Solution: Ensure proper humidity and airflow. Extend aging time.
Issue #2: Unwanted Mold Growth
- Solution: Maintain cleanliness and ensure consistent temperature and airflow.
Issue #3: Meat Too Tough
- Solution: Verify fridge temperature settings and humidity levels, and choose high-quality cuts initially.
Quick Reference Guide 📝
Here's a handy summary of key dry-aging tips to help you succeed at home:
| Step | Details |
|---|---|
| Select Cut | Use bone-in ribeye or strip loin for best results. |
| Setup | A dedicated fridge, 34-38°F, 80% humidity, good airflow. |
| Duration | 7-21 days based on flavor preference. |
| Safety | Regular check for mold, spoilage odors, and hygiene. |
| Cooking | Let steak reach room temp, sear on high heat, rest post-cooking. |
Embrace the Art of Dry Aging
Dry aging steak at home is not only a rewarding culinary challenge but also a way to unlock new levels of flavor and texture in your beef. With careful attention to detail, patience, and the right techniques, you can create restaurant-quality steaks that wow both your palate and your guests. Happy aging!

