A Step-by-Step Guide to Effectively Sanitizing Your Refrigerator
A clean refrigerator is crucial for maintaining not just the freshness of your food, but also for preventing unwanted odors and ensuring a healthy kitchen environment. With various food items, spills, and the occasional forgotten leftovers, it's easy for this vital kitchen appliance to become a breeding ground for bacteria. Let's dive into a comprehensive guide to help you sanitize your refrigerator with confidence and ease.
Why Sanitizing Your Refrigerator Matters
The refrigerator is the heart of your kitchen, housing everything from fresh produce to last Sunday's leftovers. Over time, different items can spill, leak, or simply overstay their welcome, creating an environment ripe for bacterial growth. Regular sanitization is vital for:
- Preventing Mold and Bacteria: Stops the growth of harmful organisms that can contaminate food.
- Eliminating Odors: Helps keep your kitchen and food smelling fresh.
- Extending Appliance Life: Reduces wear and tear caused by spills and grime.
With the right approach, sanitizing your refrigerator can become a simple routine that safeguards your family's health.
Preparing to Clean: Gathering Your Supplies
Before you start, it's essential to have all the necessary supplies handy. Here's what you'll need:
- Mild Dish Soap: For basic cleaning.
- White Vinegar or Baking Soda: Efficient for deodorizing.
- Warm Water: Dilutes cleaning agents.
- Soft Cloths or Sponges: Gentle on appliance surfaces.
- Microfiber Cloths: Perfect for drying and polishing.
- Toothbrush or Small Brush: Cleans hard-to-reach areas.
- Trash Bags: For discarding expired or spoiled items.
Having these items ready will make the process smoother and more efficient.
Empty the Refrigerator and Sort Through Items
Before deep cleaning, ensure you:
- Remove All Contents: Take everything out, checking each item for expiration dates or spoilage.
- Sort the Items: Place perishables in a cooler with ice packs to keep them fresh while you clean.
- Discard Expired Products: Dispose of anything past its prime or that appears questionable.
This step also gives you an opportunity to organize your food for more efficient storage later on.
Cleaning the Inside: Step-by-Step Process
1. Unplug the Refrigerator
Safety first! Unplugging the refrigerator prevents any electrical hazard and allows you to clean it thoroughly without wasting energy.
2. Remove Shelves and Drawers
- Take Out Removable Parts: Carefully slide out shelves, trays, and drawers. This provides access to every nook and cranny of the fridge’s interior.
- Soak and Scrub: Fill your sink with warm, soapy water and let these parts soak. Use a non-abrasive sponge to scrub away grime or sticky residues.
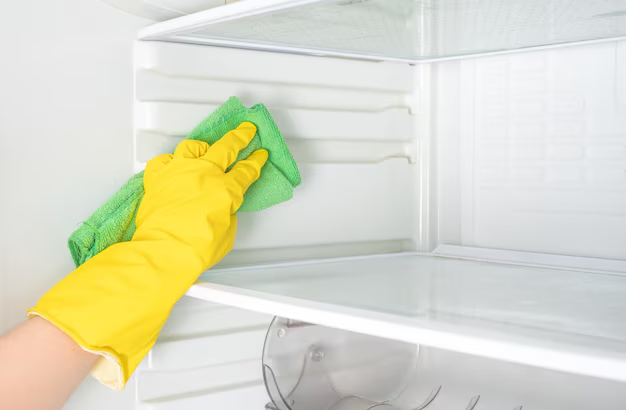
3. Wipe Interior Surfaces
- Mix Cleaning Solution: Combine equal parts vinegar and warm water, or make a paste of baking soda and water for tough stains.
- Wipe Surfaces: Use a soft cloth to clean the interior walls and ceiling of the refrigerator, focusing on spots with spills or stains.
- Scrub Crevices: Use an old toothbrush for corners and folds where grime tends to accumulate.
4. Rinse and Dry
- Rinse Surfaces: Wipe everything down again with clean water to remove any leftover cleaning solutions.
- Dry Thoroughly: Use a microfiber cloth to dry the surfaces effectively, preventing water marks or future mold growth.
Cleaning the Exterior
1. Dust and Polish
- Dust Off: Use a dry cloth to dust the top and sides before applying any cleaning solutions.
- Polish Stainless Steel: If applicable, use a stainless steel cleaner following the grain of the metal for a polished finish.
2. Clean Door Seals
- Inspect Seals: Check the rubber gaskets around the door for food particles or moisture.
- Clean and Condition: Wipe with a damp cloth dipped in vinegar or soapy water. Dry thoroughly to prevent mold.
Reassemble and Restock
- Replace Clean Parts: Once dry, return shelves and drawers to their places.
- Organize: Place food back in the refrigerator, organizing items by category for easy access.
- Plug Back In: Restore power by plugging the refrigerator back in.
Regular Maintenance Tips
Keeping your refrigerator clean and fresh doesn't have to be a monthly ordeal. Here are some tips to reduce odors and manage spills:
- Wipe Spills Immediately: Don't wait for a sticky spill to set. Clean it as soon as it happens.
- Use Baking Soda: Keep an open box of baking soda on a shelf to absorb odors.
- Organize Weekly: Regularly review the contents to manage leftovers and avoid waste.
Summary Table: Key Takeaways 🧼
| Task | Tools Needed | Frequency |
|---|---|---|
| Empty and Sort | Trash Bags, Cooler | Monthly or as needed |
| Clean Interior | Vinegar/Baking Soda, Cloths | Monthly |
| Dust and Polish Exterior | Dry Cloth, Stainless Cleaner | Bi-weekly |
| Manage Door Seals | Vinegar, Toothbrush, Cloth | Monthly |
| Organize and Maintain | Baking Soda | Weekly |
📝 Tips for a Fresh Fridge:
- Early morning or late evening hours can be cooler times to clean, avoiding food spoilage.
- Label leftovers with dates to keep tabs on freshness.
- Rotate baking soda boxes every three months for optimal odor control.
Incorporating these practices will transform refrigerator sanitization from a daunting task to a manageable routine. With a clean and organized fridge, you enjoy not only a healthier home but also a more efficient and pleasurable cooking experience.