How to Revive and Refresh Your Refrigerator Like a Pro
Have you ever opened your refrigerator door, only to be met by unexpected odors or a less-than-clean interior? If so, you're not alone. A dirty refrigerator can become a breeding ground for germs and unwanted smells, which can affect your food and beverages. Fortunately, restoring your refrigerator to pristine condition is within reach with a little guidance and some elbow grease. In this comprehensive guide, we'll explore tried-and-true methods for cleaning a dirty refrigerator, touching on related topics that will deepen your understanding and offer practical value.
Why Cleaning Your Refrigerator Is Important
Keeping your refrigerator clean goes beyond mere aesthetics. It plays a crucial role in maintaining food safety and ensuring your kitchen appliance runs efficiently. Here's why:
Food Safety: A clean refrigerator prevents bacteria and mold from contaminating your food. It reduces the risk of foodborne illnesses, which can result from spoiled or improperly stored items.
Efficient Operation: A refrigerator free from dirt and spillages operates more efficiently, conserving energy and extending the appliance's lifespan.
Odor Control: Regular cleaning removes spoiled food and spills that are often the source of unpleasant odors.
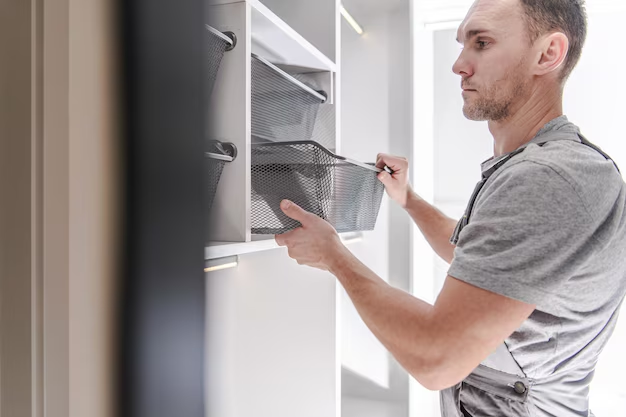
How to Clean Your Refrigerator Step by Step
Cleaning your refrigerator may seem daunting, but breaking it down into manageable steps can make the process straightforward and stress-free.
Step 1: Preparing to Clean
1. Gather Your Supplies
Before you begin, assemble the cleaning tools and products you'll need:
- Microfiber cloths or sponges: Gentle on surfaces and effective at picking up dust and grime.
- Mild dish soap: A safe, effective cleanser for most refrigerator surfaces.
- Baking soda: A natural deodorizer.
- White vinegar: A powerful, natural disinfectant.
- A bucket or basin: For mixing cleaning solutions and soaking removable parts.
- Old toothbrush: Useful for scrubbing small crevices.
2. Empty the Refrigerator
Remove all food items. This is an excellent opportunity to check expiration dates and dispose of anything that's spoiled. Consider using a cooler to keep perishable items fresh while you clean.
3. Unplug the Refrigerator
For safety reasons, it's best to unplug your refrigerator while cleaning it. It also conserves energy during the time that the doors may be kept open.
Step 2: Cleaning the Interior
1. Remove and Soak Shelves and Drawers
- Take out all removable shelves and drawers.
- Soak them in a solution of warm water and mild dish soap. Let them sit while you move on to the next steps.
2. Clean the Inside Walls
- Mix a solution of warm water and dish soap.
- Use a microfiber cloth or sponge to wipe down all interior surfaces, including door seals. For stubborn stains, use a small amount of baking soda on a damp cloth.
3. Tackle Hinges and Seals
- Pay extra attention to door seals and hinges. An old toothbrush can help clean grime from the tight spots.
4. Rinse and Dry
- Once cleaned, go over all surfaces with a cloth dampened with plain water to remove soap residues.
- Dry all surfaces thoroughly with a clean towel.
Step 3: Cleaning the Exterior
1. Wash the Doors and Handle
- Use a mild soap solution to clean the refrigerator doors. Rinse off any residue with a damp cloth, then dry.
2. Check the Coils
- Vacuum or brush any dust off the coils at the back or underneath your fridge if accessible. Clean coils contribute to better energy efficiency.
Step 4: Reassemble and Restock
1. Dry and Replace Shelves and Drawers
- Ensure that all parts are completely dry after soaking, then place them back in the refrigerator.
2. Organize and Restock
- Return your food items, organizing them by category. Use this opportunity to wipe down any containers or jars before placing them back.
Enhancing Efficiency and Odor Control
In addition to a basic cleaning regimen, there are strategies to maintain your refrigerator’s cleanliness and function:
Use Bins or Trays: Contain similar items together in bins or trays to prevent spillage from spreading.
Clear Containers: Store leftovers in clear containers to minimize risk of forgotten food turning bad.
Baking Soda for Odors: Keep an open box of baking soda on a shelf to neutralize odors.
Temperature Settings: Check that your fridge is set to the optimal temperature (usually around 37°F or 3°C) to keep food fresh longer.
Summary of Key Tips 🔑
Cleaning Essentials:
- 🧺 Supplies: Microfiber cloths, dish soap, baking soda, white vinegar, toothbrush
- 💧 Solutions: Warm soapy water, vinegar for disinfecting
- ⏲ Frequency: Ideally clean once every three to four months
Key Practices:
- ❄️ Empty and unplug before cleaning
- 🧽 Soak removable parts
- ⚙️ Pay attention to seals and coils
- ⚖️ Organize for efficiency
Going Beyond: Advanced Maintenance and Long-term Care
While regular cleaning is vital, long-term care can further prolong your refrigerator’s life. Consider the following:
Regular Inspections: Periodically check seals, gaskets, and the door closure mechanism for wear and tear.
Defrost When Needed: If your freezer is prone to frost buildup, defrost it to restore operational efficiency.
Professional Servicing: For persistent issues or poor performance, it may be beneficial to consult a professional technician.
Conclusion: Keep It Fresh and Functioning
With these tips and methods at your disposal, maintaining a clean and efficient refrigerator is entirely feasible. By incorporating regular cleanings into your routine, you can not only extend the life of your appliance but also foster a healthy kitchen environment. Remember, the time invested in proper maintenance now can save you from bigger hassles down the line. So roll up your sleeves, open that refrigerator door, and transform it into a spotless haven for your food and beverages.