Revitalize Your Fridge: The Ultimate Guide to Cleaning Refrigerator Rubber Gaskets
A refrigerator encompasses much more than just keeping your groceries cool and fresh. It’s an essential appliance, pulling the weight of food preservation day in and day out. A clean refrigerator rubber gasket—often overlooked—is pivotal to maintaining efficiency and hygiene. Over time, grime and mold can settle in your refrigerator’s rubber gasket, compromising the seal and impacting energy use. Ready to dive into a deep clean? Let’s explore the detailed process to invigorate your fridge’s longevity.
Why Is Cleaning the Refrigerator Gasket Important?
The Role of the Gasket
The rubber gasket that lines your refrigerator door is critical. Its primary role is to maintain a tight seal that keeps the cold air inside and the warm air out. This ensures your appliance operates efficiently and foods remain in optimal conditions for as long as possible.
Consequences of a Dirty Gasket
When the gasket accumulates dirt, grime, and mold, its elasticity and sealing efficiency are compromised. This can lead to:
- Increased Energy Usage: An improper seal forces your refrigerator to work harder, elevating energy bills.
- Food Spoilage: A weak seal means temperatures may fluctuate, impacting food freshness.
- Unpleasant Odors: Stuck food particles and mold contribute to foul smells, affecting the appliance’s interior.
Gathering Your Cleaning Supplies
What You’ll Need
Embark on this cleaning mission with the right tools at hand:
- Warm Water and Mild Dish Soap: Gentle cleaning agents prevent material degradation.
- Microfiber Cloths or Sponges: Soft textures ensure minimal abrasion.
- White Vinegar or Baking Soda: Natural deodorizers and disinfectants, effective against mold.
- Old Toothbrush: Reaches those tiny grooves with precision.
- Air Drying Time: Essential for ensuring no moisture stays trapped post-clean.
Step-By-Step Cleaning Process
Step 1: Prepare Your Workspace
Ensure your appliance is turned off before cleaning. This minimizes energy consumption and ensures safety.
Step 2: Inspection
Carefully inspect the seal for visible dirt and mold spots. This preliminary step helps tailor your cleaning approach.
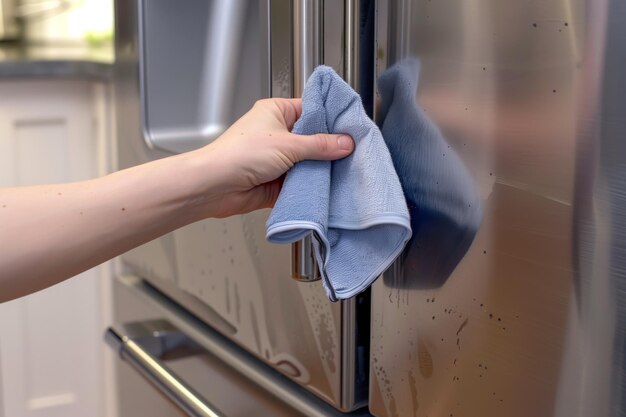
Step 3: Initial Surface Clean
Use a mixture of warm water and mild dish soap. Dampen a microfiber cloth and gently wash the surface of the gasket. This easily dislodges most particles.
Step 4: Deep Clean Trouble Spots
- Using White Vinegar: Its antibacterial properties are effective against mold. Create a 1:1 mix of water and vinegar, apply it to an old toothbrush, and gently scrub the grooves.
- Baking Soda Paste: If vinegar isn’t your preference, make a paste using baking soda and water. Its gentle abrasiveness excels at cleaning and deodorizing.
Step 5: Rinse and Dry
With another damp cloth, rinse the gasket by wiping away soap residue. Follow up by thoroughly drying with a dry cloth to prevent future mold development.
Maintenance and Prevention Tips
Routine Cleaning
Regularly wiping down your refrigerator gasket with warm soapy water prevents dirt accumulation.
Mold Prevention
Refrigerators located in humid environments benefit from placing a silica gel packet near the gasket to absorb excess moisture.
Periodic Inspections
Quarterly inspections help detect wear sooner, potentially saving on costly repairs.
When You Need to Replace the Gasket
Recognizing a Failing Gasket
Over time, gaskets may wear out due to temperature fluctuations and mechanical stress. Common signs of failure include:
- Visible Cracks or Deformities: Affect the ability to form a seal.
- Persistent Mold Growth: Recurring mold might suggest irreversible damage.
Replacement Procedure
Replacing a faulty gasket is relatively straightforward:
- Purchase the Correct Model: Double-check your appliance model for compatibility.
- Removal and Installation: Carefully remove the old gasket and snap the new one in place, ensuring a uniform fit.
Key Takeaways: Maintaining Your Fridge’s Seal
Here’s a quick visual checklist to support your cleaning routine:
🛠️ Cleaning Steps
- 🧽 Prepare materials: Cloth, water, soap, vinegar/baking soda.
- 🔍 Inspect and clean: Focus on removing visible dirt.
- 🔄 Deep clean: Employ vinegar or baking soda.
- 🚰 Rinse thoroughly: Dry to finish.
⚠️ Maintenance Tips
- Quarterly inspections
- Guard against mold
- Routine cleaning
🔄 Replacement Reminders
- Keep an eye out for cracks
- Know when to replace for optimal efficiency
Reinvigorate your refrigerator by focusing on its essential parts, like the often-forgotten rubber gasket. With a comprehensive cleaning routine, you’ll enjoy better performance, efficiency, and hygiene, ensuring your appliance—and your food—remains at its best. By dedicating a small fraction of your time to this task, you’re investing in your refrigerator’s longevity and functionality, providing peace of mind and bolstering cost-effectiveness.