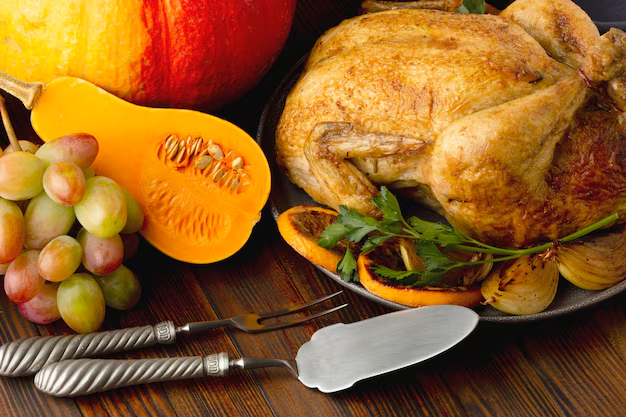
The Ultimate Guide to Thawing a Frozen Turkey in the Refrigerator
Thanksgiving and other festive occasions call for a grand feast, and nothing quite captures the spirit of these celebrations like a perfectly roasted turkey. However, preparing this centerpiece requires some planning, especially when dealing with a frozen turkey. Thawing your turkey safely and effectively in the refrigerator ensures that it maintains its quality while reducing the risk of foodborne illness. This comprehensive guide will walk you through the entire process of refrigerator thawing, answer common questions, and provide some practical tips to ease your preparation.
🎯 Why Refrigerator Thawing is the Best Method
When it comes to thawing a turkey, the refrigerator method is recommended by experts as the safest and most reliable method. Here’s why:
- Safety First: Thawing at a consistent, cool temperature keeps your turkey out of the “danger zone”—the temperature range where harmful bacteria can grow rapidly.
- Quality Maintenance: The gradual thawing process helps maintain the texture and flavor of the turkey, ensuring a juicy and delicious result.
- Convenience: Although it requires planning due to the longer timeframe, fridge thawing is a hands-off process, giving you time to focus on other preparations.
⏳ How Long Does It Take to Thaw a Frozen Turkey in the Refrigerator?
The time it takes to thaw a turkey in the refrigerator depends primarily on the size of the bird. Here is a general guideline:
- Whole Turkeys: Allow approximately 24 hours for every 4 to 5 pounds of turkey.
- 8 to 12 pounds: 2 to 3 days
- 12 to 16 pounds: 3 to 4 days
- 16 to 20 pounds: 4 to 5 days
- 20 to 24 pounds: 5 to 6 days
Keep in mind these are just estimates. For precise planning, always err on the side of giving your turkey extra time to thaw. If your turkey thaws earlier than expected, it can remain safely in the refrigerator for an additional day or two.
📋 Step-by-Step Guide to Thawing Your Turkey in the Refrigerator
1. Choose the Right Spot
- Place your turkey on a tray or in a pan to catch any juices that might leak as it thaws. This prevents cross-contamination with other foods in the refrigerator.
- The coldest part of the fridge, usually towards the back, is ideal for thawing the turkey safely.
2. Calculate Thawing Time
- Estimate thawing time based on the weight of your turkey, as listed above, to determine when to start the process.
- Mark your calendar or set a reminder to avoid a last-minute scramble.
3. Begin the Thawing Process
- Remove any packaging, if possible, and place the turkey breast-side up on the tray.
- Ensure the temperature of your refrigerator is set to 40°F or below to maintain a safe environment for thawing.
4. Monitor and Prepare
- Check your turkey daily to ensure proper thawing and adjust your plans if needed.
- Once thawed, the turkey can stay in the refrigerator for an additional 1-2 days before cooking.
🔍 Troubleshooting Common Thawing Problems
Even with careful planning, things can occasionally go awry. Here’s how to handle some common scenarios:
🦃 The Turkey Isn’t Fully Thawed
If your turkey is not completely thawed the night before roasting:
- Use cold water thawing as a backup method. Submerge the turkey in cold water, changing the water every 30 minutes. This should speed up the thawing process.
🍗 Thawing Timestamps
If you mistakenly thawed the turkey too early:
- Rest assured, a thawed turkey can remain in the fridge for up to two days before you need to cook it.
💡 Pro Tips for a Perfectly Thawed Turkey
- Consistency is Key: Ensure the refrigerator maintains a consistent temperature by using a fridge thermometer.
- Early is Better: Start thawing your turkey a day or two earlier than needed to allow for any mishaps.
📝 Quick Thawing Reference Table
Here’s a handy table to help you quickly determine your turkey thawing timeframe:
| Weight (pounds) | Thaw Time (Days) |
|---|---|
| 8 - 12 | 2 - 3 |
| 12 - 16 | 3 - 4 |
| 16 - 20 | 4 - 5 |
| 20 - 24 | 5 - 6 |
🍽️ Beyond Thawing: Prepping Your Thawed Turkey
Once your turkey is successfully thawed, prep work is essential to achieving that mouth-watering roast. Here’s how to proceed:
🤲 Clean and Season
- Pat Dry: After removing from the fridge, thoroughly pat the turkey dry to help seasonings adhere and promote even browning.
- Add Flavor: Season the turkey generously with salt and herbs for a delicious, savory taste profile.
🍽️ Plan Your Cooking Time
- Calculate roasting time based on the turkey’s weight. Aim for about 13 minutes per pound at 350°F for an unstuffed turkey.
🕰️ Let It Rest
- After roasting, let the turkey rest for about 20 to 30 minutes. This allows juices to redistribute, ensuring a tender and juicy meat.
🚀 Tailoring Your Food Prep Strategy
While refrigerator thawing is the gold standard, not every situation allows for it. Here’s a quick guide to other thawing methods:
Aquatic Assistance
The Cold Water Thawing method is faster than refrigerator thawing but requires more attention:
- Change Water: Refresh the water every 30 minutes to maintain a cold environment.
- Quick Reaction: Allow about 30 minutes per pound. Hence, for a 16-pound turkey, budget 8 hours.
📝 Highlighted Tips for Success
- 🧊 Preparation Pays Off: Start early to accommodate any unexpected delays.
- 📅 Mark Your Calendar: Planning makes execution seamless.
- 🎉 Enjoy the Process: With plans set, you can focus on crafting memories rather than just meals.
Embracing Confidence in the Kitchen
Understanding the ins and outs of turkey thawing not only ensures a successful feast but also enriches your culinary skills. Armed with this knowledge, you can confidently navigate holiday preparations, knowing you've laid the groundwork for a memorable and delightful meal.
The next time you're tasked with thawing a turkey, remember these tips and steps. They’ll guide you to a successful culinary experience and help you serve up a turkey that's as delightful as the occasion itself. Season your Thanksgiving with knowledge and enjoy the flavors of a job well done! 🍗🎉