Safely Removing Plastic Wrap from Your Refrigerator: A Comprehensive Guide
You finally brought home your brand-new refrigerator, excited to fill it with all your groceries. But before you can start, you face a common challenge—removing the plastic wrap that protects its surfaces. While it may seem simple, doing it correctly ensures that your appliance is ready for optimal performance and showcases its sleek design.
Why Do Refrigerators Come with Plastic Wrap?
Refrigerators are typically wrapped in protective plastic to safeguard against scratches, dents, and dust during transport and storage. This layer acts as a barrier, preserving the exterior's finish until it arrives safely at its final destination—your home. While essential for protection, the wrap must be fully removed to ensure that the refrigerator can function properly without obstructions.
Tools You Might Need
Before you begin the removal process, gather these items to make the task quicker and safer:
- Soft Cloth: To wipe away any residue or clean as you go.
- Plastic Scraper: Gentle on surfaces for removing stubborn wrap.
- Scissors or Box Cutter: For precision cutting and tackling any edges.
- Mild Cleaner: To remove any adhesive left on the surface.
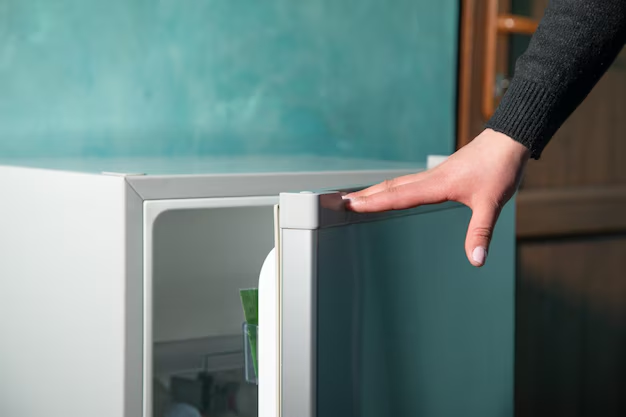
Step-by-Step Guide to Removing Plastic Wrap
1. Begin with a Secure Base
Start by ensuring the refrigerator is placed securely and unplugged for safety. This not only prevents electrical hazards but also makes it easier to maneuver around the appliance.
2. Locate a Starting Point
Find a corner or a loose edge of the plastic wrap. Often, manufacturers will leave a flap or seam accessible to initiate the removal process. Pro Tip: Look near the door edge or base of the fridge.
3. Peel Carefully
Using steady, gentle motions, begin peeling the wrap. It’s important to avoid using excessive force to prevent tearing the plastic, which can become tricky to remove if it breaks.
4. Use a Plastic Scraper for Tough Spots
If you encounter areas where the plastic is particularly stuck, use your plastic scraper. This is especially helpful around edges or handles where adhesive might be stronger.
5. Cut Strategically
For sections that are difficult to peel away due to the size or type of the wrap, carefully cut using scissors or a box cutter. Pay attention to avoid scratching the refrigerator's surface.
6. Clean Residue
Once the plastic is fully removed, use a mild cleaner with a soft cloth to wipe down the surface, removing any sticky residue left behind. Avoid abrasive cleaners, which can damage the finish.
7. Final Inspection
Ensure all bits of the plastic have been removed, especially from vents and fans, which can obstruct airflow if left covered.
Common Challenges and Solutions
Stubborn Adhesive
Sometimes, bits of adhesive may remain, especially around corners or edges. A bit of coconut oil or a commercial adhesive remover applied gently with a cloth can help lift this residue without damaging the surface.
Awkward Angles
If reaching certain areas proves difficult, reposition the refrigerator slightly or remove adjustable parts like shelves to gain better access.
Large Appliances
For larger refrigerators, you might need an extra hand. Having someone hold the appliance steady while you maneuver around can make the process more manageable.
Safety Tips
- Unplug the Appliance: Always ensure the refrigerator is disconnected from power to prevent electrical accidents.
- Avoid Metal Tools: Metal can scratch or damage the appliance, so stick to plastic or wooden tools.
- Work in a Well-Lit Area: Good lighting helps you see stubborn bits of plastic and ensures a thorough job.
Maintaining Your Refrigerator's Pristine Appearance
Once you've successfully removed the plastic wrap, maintaining your refrigerator with regular cleaning is crucial.
Planned Maintenance Routines
Monthly Check-Up:
- Wipe Exterior: Use a soft cloth with mild detergent.
- Interior Cleaning: Remove expired items and wipe down shelves and drawers to prevent odor buildup.
Quarterly Deep Clean:
- Coil Cleaning: Vacuuming the condenser coils (as accessible) for energy efficiency.
- Seal Inspection: Ensure door seals are functional and clean. Replace if necessary to maintain proper temperature regulation.
Extending Shelf Life and Optimal Performance
Proper usage and placement can enhance both appliance longevity and food storage:
- Temperature Settings: Ensure the temperature is set for optimal food preservation, generally at 37°F (3°C) for the fridge and 0°F (-18°C) for the freezer.
- Regular Checks: Periodically check that vents are unobstructed to maintain efficient airflow.
A Quick Recap: Essential Takeaways
Here’s a handy checklist to ensure you’ve set yourself up for success:
Key Steps to Remove Plastic Wrap 🚀
- Secure Base: Unplug and safely position the refrigerator.
- Peel Carefully: Start at an edge; use a scraper for tough spots.
- Cut if Necessary: Use scissors for precise removal.
- Clean Residue: Apply mild cleaner or adhesive remover for residues.
- Final Check: Ensure all vents and fans are clear.
Maintenance for Longevity 🛠️
- Monthly Exterior Wipe: Keep it looking sleek and new.
- Quarterly Deep Clean: Enhance efficiency with deeper cleaning.
- Temperature & Seal Check: Optimize for efficiency and shelf life.
Successfully removing the plastic wrap from your new refrigerator doesn't just enhance its visual appeal but also ensures it operates at its best. This initial step of care sets the stage for the fridge to serve your household needs efficiently, storing your food safely and extending the life of your appliance. Follow this guide, and you'll enjoy a pristine, fully functional refrigerator in no time!